Showing posts with label bread. Show all posts

22/06/2011

and she was moving very slowly.

ladies and gentlemen, i promised you i would return to conclude my sourdough efforts, and in true lazy mitchell style, it has taken me god knows how long to do so. i say lazy, although once again other things have seduced my attention away; namely being elbow deep in maths projects for work; a state which taxes my brain to the point of total lack of energy.

i know, i know, excuses excuses, but i just want it on the record that it isn't like i didn't want to tell you about my sourdough. in fact, i have been dying to. it's basically the coolest thing i've done since i started this blog, in my opinion. that might just be me getting excitable at taking the diy-process to the next level, but working with live yeasts is cool. if i end up some sort of crazy bread lady who croons to her sourdough starter as she feeds it i will be entirely unsurprised. there's not a whole hell of a lot to do in these villages, and anthropomorphizing my bread seems like one of the more pleasant ways available to descend into an eventual total loss of sanity.

anyway, as i've said before, enough of the bullshit, and onto the bread. so we already know all about my starter, which had maybe a week and a half to stabilize and establish itself before i was gonna make anything with it. it's been a nice little routine-maker, feeding it daily. i stand and whisk in the kitchen as my brain slowly comes to life after the day's first coffee and cigarette (usually taken while inspecting the garden) and come up with the things i'm gonna do over the course of the day. i could get used to having this thing with me for the rest of my life. there are ways in which you can slow down its activity, meaning you don't have to feed it as often, such as putting it in the fridge, but personally i like the regularity of the daily feeding, and you have to have it very active to bake with, so i keep it that way as i like to have the capacity to make whatever kind of bread i want, whenever i want.

having said that, sourdough does involve some prep the previous day (if you're not quite as organized a cook as you want to be, like myself, you'll find that getting into this habit gives you way more of a sense of being super on it and in control than is necessary). the technique i used for my first set of loaves, wholemeal sourdough, was my trusty daniel stevens' river cottage bread handbook; and it goes a little something like this:

basic wholemeal sourdough

makes 2-3 loaves

for the sponge:
500g strong wholemeal wheat flour
600ml warm water
a ladleful of very active sourdough starter

for the dough:
600g wholemeal wheat flour, plus extra for dusting
25g salt

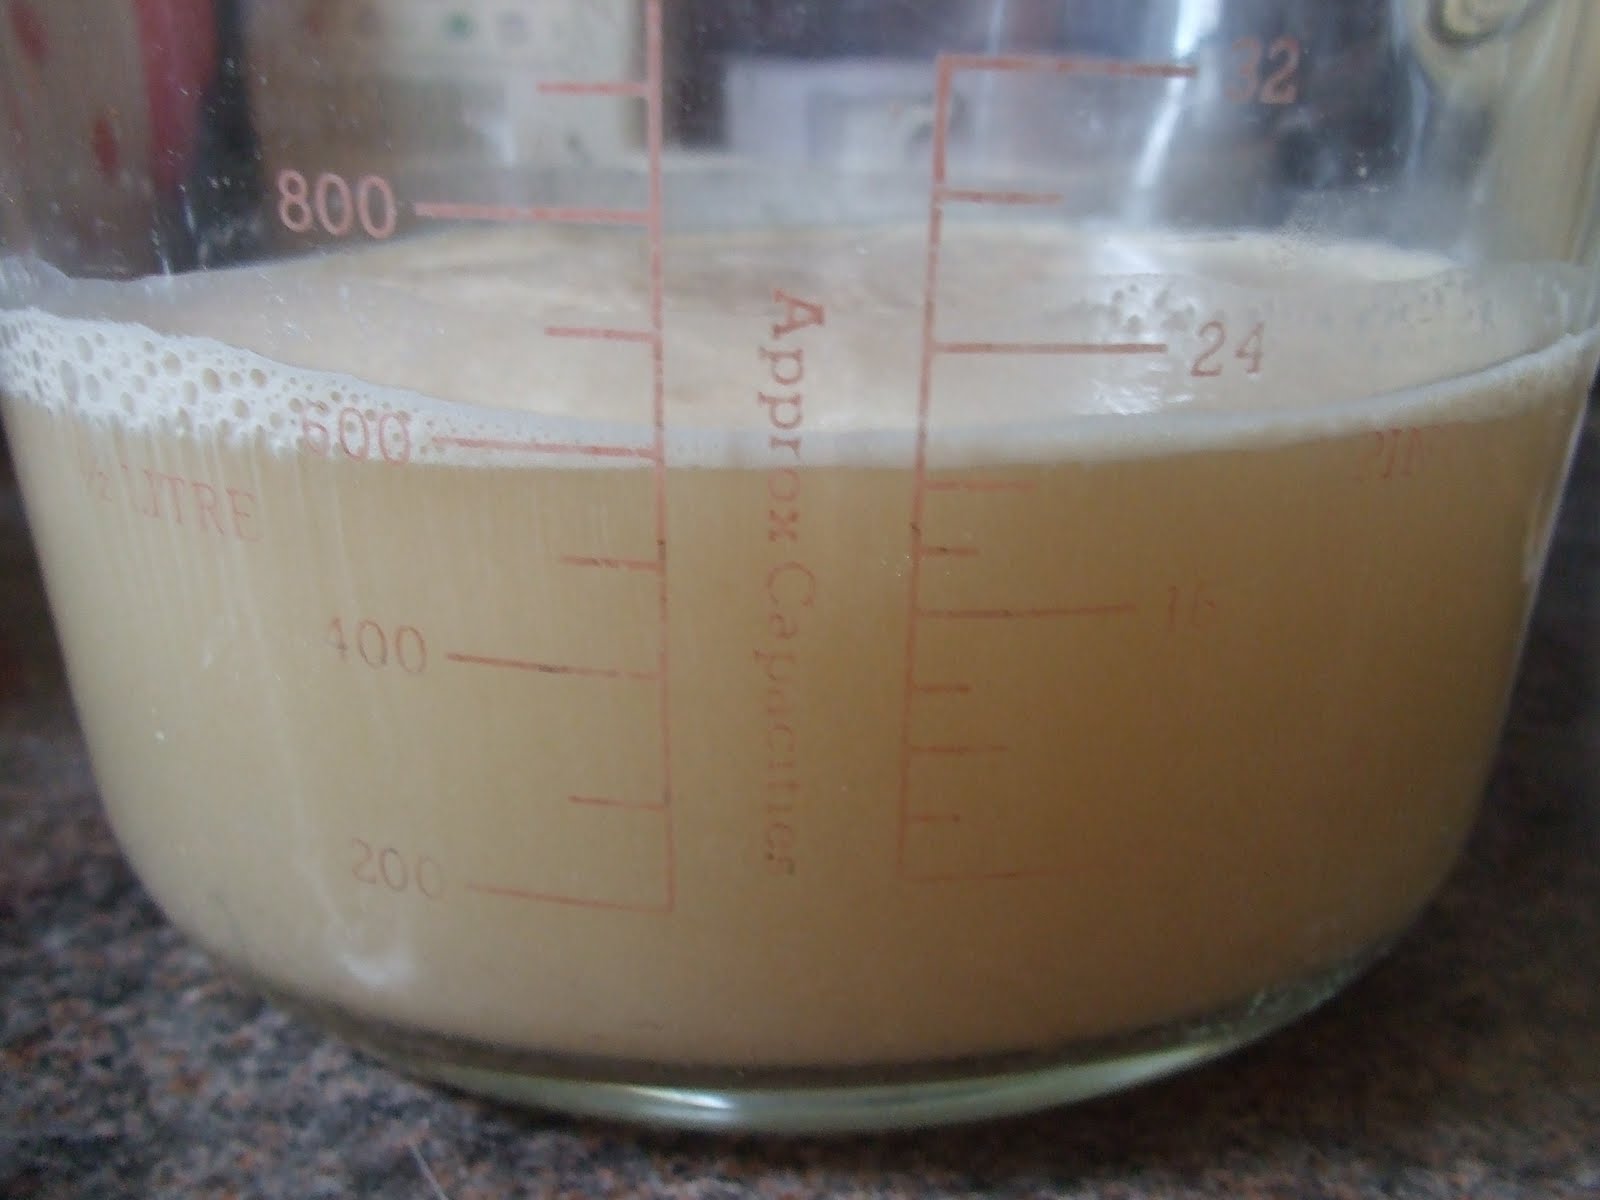
before you go to bed, make the sponge. mix all the dry ingredients together by hand in a large bowl or plastic container. mix thoroughly, squeezing out floury lumps if you come across them. put the lid on the container, or put the bowl in the plastic bag until morning.

when i went to bed, mine looked like this:

by morning it looked like this:


the next day, mix in the flour and salt, and squash it all together, addng more flour or water as necessary, to form a soft, easily kneadable, sticky dough. turn it onto a clean work surface, and knead for about ten minutes until smooth and springy.

form the dough into a tight round, flour it all over and place it in a clean bowl. like so:

cover with a plastic bag and leave to rise for an hour. then you should end up with something like this (which since the book says don't expect much rise at first, is a bit of a shock):


tip it out onto the work surface, form it into a round again, and return to the bowl to rise for another hour. repeat this process once, or even twice more. you will notice the dough becoming increasingly airy. like so:


and so:

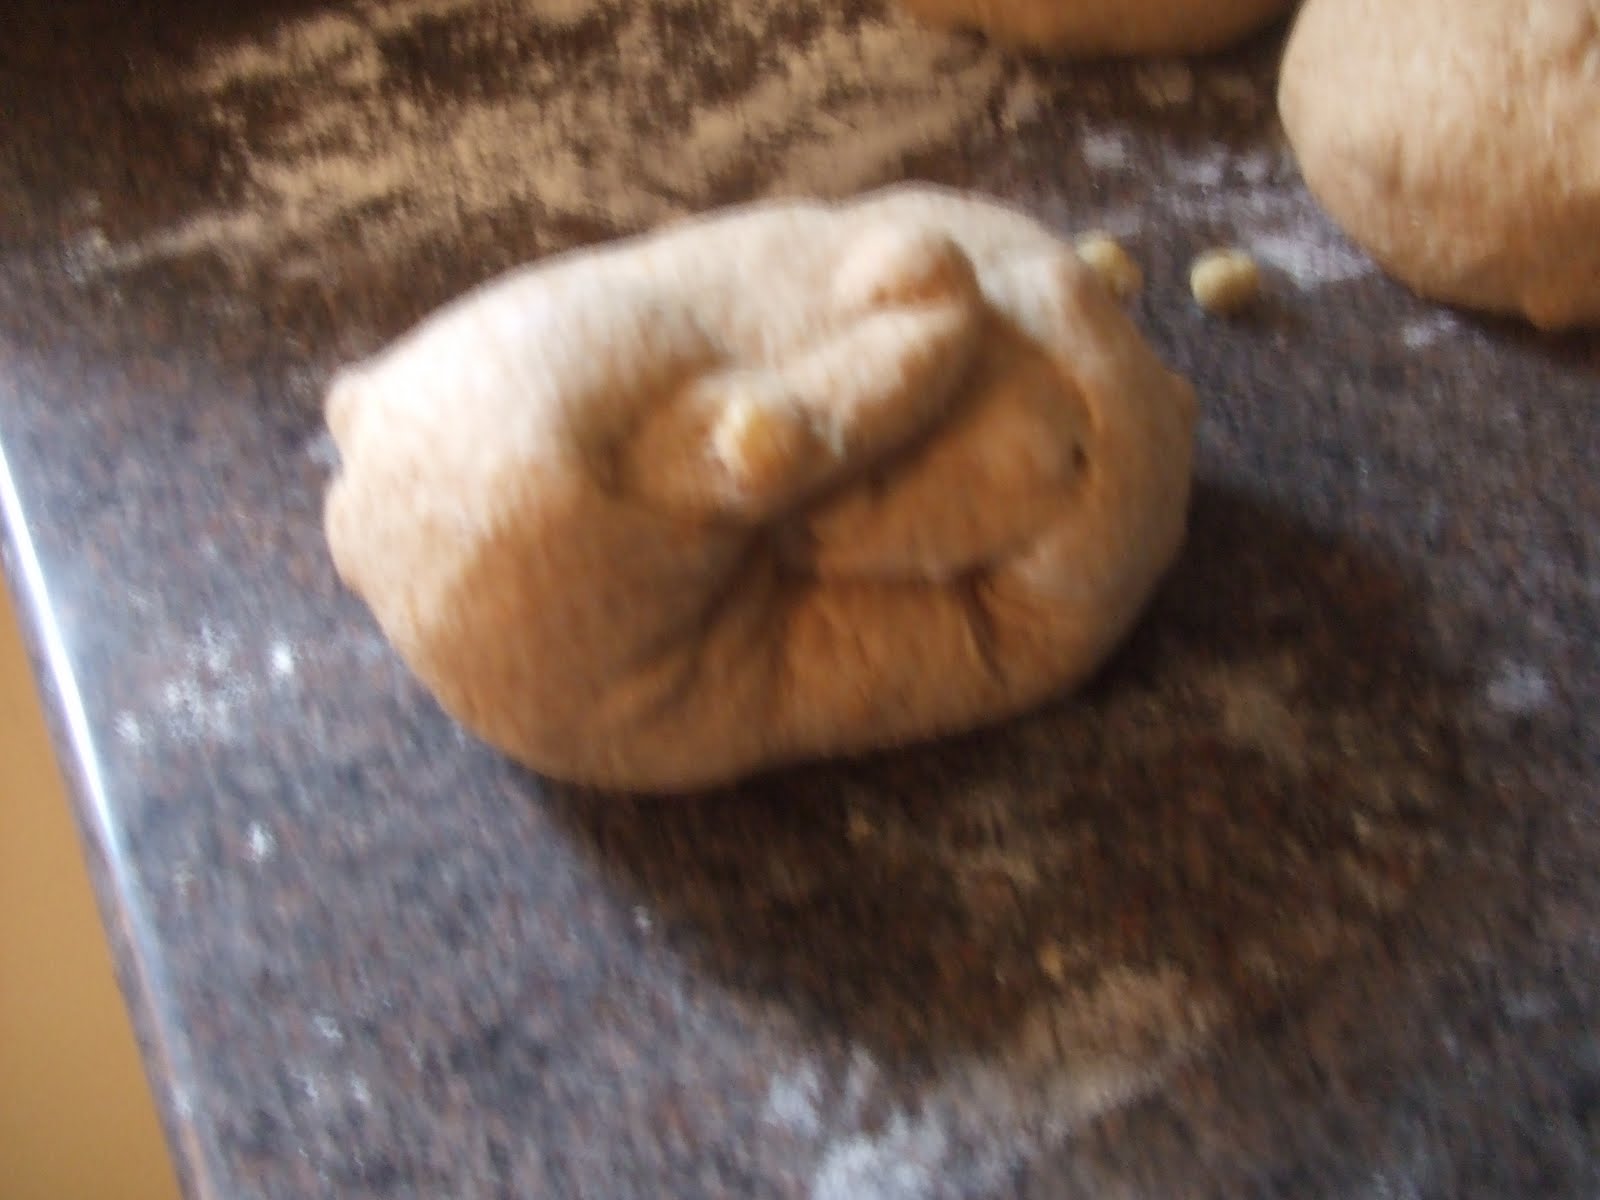
after the final rising period, tip the dough out onto the work surface and deflate it by pressing all over with your hands. divide into two or three, and shape into loaves. coat with flour, then transfer the loaves to well-floured wooden boards, linen cloths, tea towels or proving baskets. like so:


lay a plastic bag over the whole batch to stop it drying out, and leave to prove until almost doubled in size; which could be anything from 1-4 hours depending on the temperature of the dough and the vigour of your starter. mine took just over an hour:


when the loaves are almost ready, preheat the oven as high as it will go, put a baking stone or heavy baking tray inside, and place a roasting dish on the bottom shelf. put the kettle on. have a spray bottle full of water, aserrated knife and an oven cloth ready, as well as a peel or rimless baking sheet if you are using a baking stone.

when the loaves are ready, transfer them to the hot tray, or one at a time to the peel. slash the tops with a serrated knife (i didn't do this for mine, cos i could see natural cracks had formed in proving). put the tray in the oven, or slide each loaf onto the stone, pour some boiling water into the roasting dsh, and shut the oven door as quick as you can.

turn the heat down after about 10 minutes to 200 degrees c/gas mark 6, if the crust is still pale, 180 degrees c/gas mark 4 if the crust is browning noticeably, or 170 degrees c/gas mark 3 if the crust is browning too quickly. bake until the loaves are well browned and crusty, and sound hollow when you tap them on the bottom. this will take 30-50 minutes depending on the size and shape of your loaf.

so i totally forgot to photograph my finished loaves, because i'm an idiot. here is what was left the morning after baking:


not much, as you can see. i made a big one for casa mitchell, and two smaller ones to give to my baking guinea pigs, my boss aled, (who actually sulks if he doesn't get any bread when i'm baking), and my american friend ed, who i think i've mentioned before, because he and i trade garden produce and food stuff all the time. i'm still waiting to hear from them, but i'm expecting good things, because the crust on this was amazing. i think it's the longer proving time and exposure to air, but i am serious when i say i might have found crust nirvana. i'm glad i didn't slash my loaves, as to be honest, i think combined with the cracks that happened from me shaping them into a round, it would have looked ugly and created a bizarre risen shape, not to mention disrupting the aforementioned crust. the bread itself tasted amazing, it had a kind of hoppy, beery note to it that i wasn't expecting given the sharp, almost pear drop notes my starter has taken on. this is my first venture into sourdough folks, but by no means will it be my last. it's such a pleasurable process that i'm finding it very difficult not to bake sourdough every day; about the only thing stopping me is my complete awareness of what such an excess of carbs would do to my body.

11/06/2011

patience

so last time i left off talking about long term bread projects and an experience which has left me looking for a sort of yeasted holy grail, right? right. i think before i get fully into the swing of discussing said project, i should let you in on a little secret...


i am not a patient person. not in the slightest. i have never really had to be. i'm still in my early twenties, and have only very recently moved out of that phase of life where life feels as though it never slows down long enough for you to catch your breath; what with all the new opportunities and lifestyle changes that being in higher education flings at you every minute. i have never had to wait for anything simply because i've never had the time to do any waiting, always being busy with something or other. but since i quit education last year, the pace of life has changed considerably. my life's progression no longer relies upon me, my books, and how fast i can type. there are other people in the mix. there is money in the mix. i can no longer fast track myself simply by working longer hours; i have to wait for things. and it's something that, although previously i would have said i was good at, is slowly driving me round the bend. consequently, in my long-standing tradition of setting myself projects over the summer so as not to go crazy in the longer days, this summer's projects all have one thing in common. they require me to be, or at least learn to be, patient.


in cooking terms, this means a relatively hands-off project, something that requires regular maintenance but not too much faffing. given that i had already previously decided that 2011 would be the year of mastering bread baking; the idea of making and endeavouring t kep a sourdough starter seemed like a very good place to start on Operation Patience. so i did what i do best, and spent at least a week reading anything i could get my hands on regarding wild yeasts (and yes, you did read that right; i deviated from my beloved river cottage bread handbook).


it has been a week since i started my sourdough adventure; and while we're not yet at the stage where it's on an even keel enough to bake with, i feel i can now confidently start telling you the hows, whys, and whats of the process. given that i consulted several sources, this is merely the way i have gone about things, so i will issue here the proviso that i am by no means anywhere near the expert level. the title that best befits me is probably enthusiastic amateur; and therefore when i tell you about processes and techniques, bear in mind that this is as much about me learning as it is about me teaching in any way. i couldn't think of anything worse than coming across as a patronizing know-it-all, when it's patently obvious i am far from 'knowing it all' about a practice that has been going on worldwide for thousands of years.


anyway, enough wih the bullshit, and onto the bread.


the basics


okay, so, sourdough is basically bread made with wild yeasts. i guess we're all familiar with the idea that bread = flour + water + yeasts in some combination. and usually the yeasts will be added in some external form, fresh, or dried, right? well, sourdough uses naturally occuring yeasts in the air. yep, you heard me, there are yeasts in the air. anyone who has ever had the pleasure of working in the licenced trade in anything other than a casual pour-a-few-pints-on-a-saturday capacity will already know this. it's the reason you keep beer cellars scrupulously clean; otherwise you end up with all kinds of homes for these wild yeasts to come and hang out and wreak fermentation havoc on your beer. so with sourdough you have to create a good home for wild yeasts to come and hang out and anaerobically respirate themselves silly. which is easy. you just need warmth, moisture, and a starch that can be broken down into a sugar. this home is your starter, a batter of flour and water in which you establish a yeast fermentation, and then 'feed' fresh flour in order to maintain it. you use ladlefuls of this starter, in combination with flour and water, to bake with. it couldn't be simpler. oh, and why is it called sourdough? mostly cos this wild fermentation and feeding process creates and introduces various bacteria, including lactic acid, to the starter, which lend the dough a more complex, pleasingly sour taste.


so now we know about sourdough. here is how i have gone about mine:


day one:


so, day one is, obviously, where you begin with your starter. it is advised to start off with a wholegrain flour. i chose wholegrain wheat flour for mine, although you can use rye, spelt, whatever. this is just because although possible, it takes white flours longer to reach ferment. and while i'm learning patience here, i have my limits. i started with 150g of wholewheat flour, and 250ml of warm water, and whisked them together into a thick batter (you have to be quite vigorous with your whisking, you want air pockets in the batter. i put my starter into a large, airtight container (i used a 2l tupperware box). it has to be large to allow room for frothing, and because you will be adding more to this base you have created. this is what my mixture looked like before i sealed the container:


as you can see, nothing special. the bubbles that are there are just from the whisking. i put my container into the airing cupboard, so as to give it warmth begin it's fermentation process.


day two


on day 2, i pulled out my sourdough and it looked like this:

you can see small bubbles from fermentation beginning, although the starter has only had itself to feed on so far. it smelled different, as well. rather than the slightly gluey smell of just flour and water, the dough smelled vinegary, a kind of sour-sweet smell. day two was time for the first feeding, so in went 150g flour and about 200-250ml of warm water, whisked vigorously. on with the lid, and back in the airing cupboard (i feel at this moment i should point out that the airing cupboard in this house is in my little brother's room, and as a result i took great risk to my health going in there to stow this. the things i do for my art, honestly)


day three


okay guys, this is where the difference starts to get radical. i pulled out my sourdough on day three, and this is what i got:


vigorous fermentation, as you can see. it also smelled much stronger. the only way i can describe the smell, and this may not be any help to those of you who haven't worked in commercial kitchens, is the way a large quantity of either salad cream of marie rose sauce smells. a combination of sugar and vinegar, that smells overly sickly with an edge. it's not a displeasing smell, but it certainly catches your nose and doesn't let go. right, so day three is where you begin to stabilize your starter, so you get rid of half of it, whisk in another 150g flour, and 200-250ml water, put the lid back on, but this time, keep it at room temperature.


day 4


on day four, as we can see, the fermentation has begun to stabilize itself somewhat:


it's still fairly vigorous, but the bubbles are more uniform. the smell mellowed slightly, too, gaining a bit more depth and a bit less 'bite', as it were. you repeat the process of getting rid of half of it, and adding 150g flour and 200-250ml water, from now on this becomes the regular feeding pattern for your starter. obviously once your starter is stabilized in its activity, rather than discard the excess, you start to bake with it, for those who are starting to think this is a wasteful process. again, you just put the lid on, and leave it at room temperature.


day 5


so, on day five i was greeted with:


as you can see, it is beginning, almost, to look like a slice of bread or cake in cross section. the smell gained further complexity and began to take on an almost beery note. i continued on with the established feeding pattern, and will continue to do so.


okay, so, that is a sourdough starter, ladies and gentlemen. literally the easiest thing to do, unless you're as impatient and curiosity driven as i am. i am still in the patience stage, as weekends are a notoriously busy time for me at work, leaving me no time for slow rise baking. so i am continuing the feeding programme and will hopefully be making my first sourdough loaves on tuesday. even with the waiting, this is an interesting project for me. i like the idea of sourdough, not least because it will encourage me to bake near-daily, thus giving me a calm kitchen routine to distract me from all the major things i have to wait for. but there is also the from-scratch element of it; the idea that due to differences in temperature and atmosphere, no two sourdough starters will ever be the same, and neither will the resulting bread. i like the long term nature of it, too. my friend shane told me of the pleasure he had, working in a commercial kitchen, with a starter that was over twenty years old. i like the idea of a piece of cooking heritage to take through life with me. especially if i can one day tell the story of it being something that taught me patience at a time i was feeling particulaly uneasy about waiting around for formalities. next time you can expect a report from me on the results of baking with my creation, and i hope you're looking forward to it as much as i am.


oh, and p.s.


you didn't seriously think i wouldn't sneak in a little quick action baking did you? if you're craving a little quick fix while all this goes on, it's worth making a focaccia or two to satisfy your activity cravings. this is mine:

i made two of these, with black and green olives and rosemary from the garden. one of them got traded with my neighbours for six runner bean plants. i feel like i got the better end of that deal. making focaccia may even have encouraged me to get rid of my old oil-scorched silicone baking trays in favour of some new ones, as, as you can see from the picture, mine have been through four years of war now and are starting to look a little fire-eaten.

02/06/2011

guess who's back?

i am the kind of person that definitely feels that time away from things is a necessary component in being able to appreciate them fully. i can apply this approach to pretty much every aspect of my life, from friends and family, to work, to favourite albums, novels and films. even, in fact, to my kitchen. i've always wondered if it's something particular to my tendency toward fixation; i have a habit of letting my mind focus on one idea, playing it out repeatedly until i am sick of thinking about it and have to get away from it out of some kneejerk reaction. it must be something like that, because it's always external influences that make me see the idea in new light, make it seem less oppressive and repetitive. bear with me on this, it is going somewhere.

as you can tell from the fact i have had the time to sit down and write this; i am back from barcelona, which ed and i visited with his friends tim and emma. before i went away i was actually getting sick of my kitchen, running out of inspiration and falling into the dreaded rut of seeing food merely as fuel to get me through weekend shifts. it wasn't at all that i wasn't cooking, it was that i didn't really care what i cooked, i didn't think it worth the time and energy to consider why or how i was making what i was. this listlessness probably came from major stresses in other life areas, but put quite bluntly, the time away from having to put pan to stove couldn't really have come along more conveniently.

barcelona was, obviously, a ridiculously good place for food adventures. yes, even for a strict vegetarian like myself. and by 'like myself' i mean in tow of a totally committed carnivore like ed. i managed amply, and the best bit? i didn't have to put any of the food forethought i was sick of in. but then i had a total starry-eyed moment. ed and i visited the rambla catalunya branch of taller de tapas on a 'well this place looks pretty good' whim (note to woody allen fangirls/boys, i didn't notice til after but this place actually features in vicky cristina barcelona) and spent what probably amounted to a couple of hours in absolute awe of their food. the particular moment i had came upon trying their pa amb tomaquet, which basically is totally a catalan thing, apparently: bread with tomatoes and oil. sounds simple enough, right? wrong. i ate this stuff and it was like a light came on. this bread was actually insane, ciabatta like with the crispest crust, and my brain immediately went into mad scientist mode, trying to work out how they'd done it exactly, or more accurately, trying to work out exactly how i could do it. basically, this is exactly what i was talking about earlier. someone else's idea or product or influence totally rekindling my fascination; making me look at things in a new way and set myself new challenges. as we speak today i am ticking off ingredients for an attempt at ciabatta, and earmarking as much info as i can on sourdough starters. perfect airy bread will be mine.

in the meantime, i'll give you a lifesaver bread recipe for those moments when you're not in the throes of fascination or inspiration with the process. or when you don't have time for the whole slow-rise thing. or for if you're a bad liar but still want to be able to say 'god it was so easy....and it didn't take any time' when you're showing off to mates coming around (don't act like you don't do it, we all do). this isn't bread proper, in that it has no yeast to speak of. but if it looks, feels, tastes and smells like bread, well, who is anyone to argue? it's definitely more of the rough, rustic ilk, denser than the airy mediterranean stuff i've been dreaming of since, but it has it's place in any baker's repertoire, particularly given that we're in the season for young, chalky goats cheeses. best of all, it's flour-to-table in half an hour, which gives me way more time to read up on the science of massive airholes.

walnut and honey soda bread (from the river cottage bread handbook, by daniel stevens)

200g honey (i used some i'd infused with dandelion petals, recipe here)
200g walnuts
500g plain wholemeal flour
10g salt
4 tsp baking powder
300ml water

preheat the oven to 200 degrees c/gas mark 6. soften the honey in a pan over a gentle heat. using a pestle and mortar, crush half the walnuts very finely, almost to a powder. crush the other half very coarsely. this gives the ideal combination - lots of flavour from the crushed nuts, and texture from the large pieces.

combine the flour, salt, baking powder and walnuts in a bowl. add the honey and water, and mix together until evenly combined. knead briefly to a firm dough.

divide the dough mixture in two and shape into rough rounds. flatten to about 5cm high and cut a deep cross in each, almost through to the base. bake for 20-25 moinutes or until the bread sounds hollow when tapped on the base.

allow the bread to cool a little on a wire rack. serve.

so here is mine:


basically, like i said, perfectly good bread in half an hour. a recipe ideal for those sick of the sight of their kitchen, or those busy maniacally researching other aspects of the yeasted baking process. this bread is ace with cheese of any description, or masses of butter and more honey; and i will definitely be knocking it out on a nigh-weekly basis during pear season.


anyways, what with my bread obsession well and truly back, and the fact i plan to start my sourdough adventures this week; i expect you'll be hearing a lot more from me, in far more excitable tones than have been evidenced for the past month. i cannot begin to tell you how good it feels to be excited by breadmaking again.

11/04/2011

long overdue


well, that resolution i made not to leave it so long between blog posts no matter how busy i was in the garden? it didn't work, did it? i have to say work has played a big part in it, my shifts have doubled in both length and intensity with the good weather, and schlepping up and down the flight of stairs to the beer garden carrying massive plates has ensured i have little to no energy for anything more strenuous than lifting a glass of near-frozen chenin blanc to my face of a night. i can't complain, my buns of steel and t-shirt tan will be remarkable come july if this keeps up. still, between pouring pints and wielding a watering can, i have found time to be in the kitchen, making, admittedly, incredibly minimum effort food that requires very little supervision, in pretty big batches so that i can be outside as long as possible.


now, i got myself back on the breadmaking wagon, caving to ed's continuous suggestion that i should try my hand at focaccia. we've discussed in many a time, but i had, thus far, resisted; my babysteps approach to breadmaking didn't factor in different types of bread until i'd mastered the basic technique (cue master baker joke here for those of us who refuse to get their minds out of the gutter). you don't need me to tell you the recipe, because i used precisely the same one as ed, as it also appears in my copy of the river cottage bread handbook. i chose to do focaccia purely for it's low maintenace qualities; it needs fuck all shaping, and if i'm to make hay while the sun shines i haven't got time to poach bagels, or mollycoddle loose ciabatta dough, so focaccia seemed like a good variant to play with. i got a good result, as you can see:


i used rosemary from my garden. i had to replace my rosemary plant after the last one got decapitated by a flying fence panel some time in january, which was gutting; my rosemary plant is so new that i was tempted to sub in lemon thyme while i let it acclimatise but in the end i stuck with the basics. the olive oil i used was a present from one of my regulars, bought back from the south of france in an old wine bottle, pressed by one of his neighbours there. it's these little touches i like about cooking. knowing where my ingredients come from and letting them tell ther own story is a part of the process for me. i was re-reading appetite by nigel slater the other day; and he rather exasperatingly pours scorn on people who like to make absolutely everything from scratch; insinuating they've something to prove. i have a feeling he's since changed his mind, having written a two volume series on plot-to-plate cooking, but it still makes me angry to read shit like that. i have the time to put in the extra leg work on my food, and i think it makes it more pleasurable to eat. i don't do it to impress; but if it does impress, well, result. anyway, tangent aside, the focaccia was excellent, and very well received both by my boss (who sulked last time i made bread because he didn't get any), and my american septagenarian friend ed (he of the olive oil from france, no less). it was definitely different from working with normal bread dough; and i have to say i wasn't a fan of the lack of resistance in kneading, but as it requires no shaping and no fuss it's a pretty easy bread to make between planting up pots of veg.


the other things i've made are more directly concerned with the garden. i am a big fan of multitasking, so have been zealously reading up on what weeds i can put to good use as i clear my garden of thigh height specimens. one of the most well-known edible intruders is nettles. i hesitate to say intruders because i have developed an interest in a movement called permaculture, which started in australia and is a contraction of 'permanent agriculture'. it's basis premise is to create symbiotic environments that support and sustain themselves, and it encompasses everything from companion planting to creating greywater usage systems and favouring perennial plants over annuals where possible. what has this got to do with nettles, i hear you ask? well, aside from localized weeds allowing you to determine your soil type very easily and pick plants that will thrive more intelligently, nettles are an amazingly multipurpose plant, and i am sorely tempted to leave a patch of my growing space purely for them.


now is apparently the perfect time of year to eat nettles; the spring shoots are really what you should use for cooking, as the older leaves can be somewhat tough. i made two things with my nettles, a pesto, and a soup. this was my first time cooking with them so i went with tried and tested ideas for their use, wanting very much to get a feel for what they were like as an ingredient. i read several recipes and then just sort of winged it as i went along, so here are my results:

nettle pesto


so i basically eyeballed this one. i had about 100g of nettles (a lightly packed food processor's worth), about 25g vegetarian parmesan, two cloves of garlic, a slug of olive oil (probably about fifty ml), a good handful of pine nuts, and a squeeze of lemon juice. i just blended that to a coarse paste, popped into a container, and put a layer of oil over the top; and that'll sit happily in the fridge for a month, if it lasts that long.


it's really good, actually. i tried it on pasta, first, and the heat of the pasta gave the nettles a slightly mushroomy note, which was nice. but where this stuff seems to really shine is paired with mild cheese like wensleydale, especially on homemade spelt rolls. i think if i were making this again i might be tempted to pop in a few sprigs of mint, as the nettles have a really delicate flavour. i might thin some down and use it to dress my first garden salad when my radishes, broad beans and lettuces have come to fruition, as i have a feeling that will be really good, if not necessarily traditional spring salad practice.


okay, so i also made soup. and it seems like there are as many nettle soup recipes as there are cooks, so i'm going to add mine into the mix:

kirsty's nettle soup


okay, so you need about 200g of young nettle leaves, which for the record is about this much: they obviously need to be thoroughly washed. you also need a knob of butter, a medium onion, two medium potatoes, a clove or two of garlic, a litre of veg stock, and a dollop or two of creme fraiche.


so what i did was soften the onions and crushed garlic in the butter on a low heat, and then added the peeled, diced potatoes and let them soften for about ten minutes, not letting anything catch or colour. i popped the nettles in the pan, let them lightly wilt, and added the stock, simmering until the potatoes were tender. i liquidized it with a stick blender (my new favourite toy), and added a dollop or two of creme fraiche and stirred through.


i bunged it in a bowl, finished with another swirl of creme fraiche and some black pepper (and the last of my focaccia), like so:


as you can see, it went a spring-y jade green (incidentally the exact same colour of the nail varnish i was sporting at the time, models own's grace green, which is a nifty little imitation of last year's chanel spring effort, fashion fans). it tasted like a milder version of spinach, and was immensely satisfying to eat. if i made it again, i'd probably add a glass of dry white at the same time as the nettles, because while there's a place for virtuous vegetable cookery, it's nowhere near my kitchen, and i'm madly in love with the marriage of greens, white wine and cream. so, nettle picking is now on my mandatory spring activities list, and the beauty of it is that wherever i live, there will always be nettles.


so next year's nettle projects might be more ambitious; i fancy learning the art of home brewing next year, so nettle beer might be on the cards. the best bit about eating the nettles was the satisfying feeling of both clearing space in my garden, getting something for free, and trying an ingredient i had never worked with before. also, where i only used the shoots, i cut down the rest of the nettle plants and made nettle manure for my plants. because permaculture is about giving back to the environment as much (if not more, in the early stages of establishing a system) as you take out. lovely.

15/03/2011

now back to our normal broadcast...

does anyone else find it oddly coincidental that ed posted a rabbit recipe just after i refuted the idea that my vegetarianism stems from a love of 'fluffy bunnies'? i tend to notice the tiny similarities in things, something perhaps heightened by the fact i've been devouring books voraciously over the past week; my lust for narrative seems to have doubled after my brief literary dry spell, and i'm sort of glad, actually, as i did worry that moving away from academia would dull my critical instincts somewhat. um, anyway, if i was possessed of a little less iron will than i am, that pasta (or more properly, pretty much everything ed posts) probably would have made me cave and turn back to eating all things dead and beautiful. i am, however, excellent at being stubborn even in the face of deprivation, a fact that many people who have been given the silent treatment by me will attest to.

i wish i had something a little more exciting to talk to you about today, but i guess the purpose of this post is really just a catch-all for the preserving and breadmaking i have been doing over the last week or so, a 'back to the routine' sort of roundup.
i kind of fell off the wagon in terms of preserving for a while. i think partly it has to do with how very pissed off i am that my preserving pan from amazon failed to show; partly due to my now reaching child-in-the-face-of-broken-promise levels of disappointment at the impossibility of getting any forced rhubarb (seriously, it is full-on 'but mummy i want to make pink jam and vodka!' kind of sulking, it's not pretty). in other words, i have been having a preserving tantrum, and have let my stash of jars and bottles grow without remotely thinking about what to put in them. however, this was brought to an end by the burst of life-laundry energy i get directly after celebrating my birth. i realized i still had a rather large amount of sloes in my freezer from my october picking, and they weren't going to turn themselves into anything. the sloes were what started it all, the preserving, actually. miserable about what at the time felt like my life falling apart (see for reference horrible breakup and masters quitting at the same time) i took to stalking the villages in my fake fur coat, restless for something to do. being also a bit of a nature freak at heart, when i stumbled on what i thought were sloes, i spent my evenings reading up on them online, consulting as many pictures and sources as i could, and set off the next day armed with as many tupperware boxes as i could to pick them.

my sloe picking adventure took me two hours, much of it taken up talking to an 81 year old lady who had stopped and decided to accompany me because it reminded her of being younger. and as she put it, talking to someone on her walk made her 'feel less lonely in the village'. i haven't ever seen that old lady again but i think if i do i will tell her that it worked both ways. that the pale girl in the fake fur with the tears-hoarse voice felt less lonely too, afterward. i ended up with a freezer drawer full of sloes, and after making four gin bottles worth, which aged and were ready just in time to hand out around christmas time, and get drunk on after heavy december shifts, i still had three or four tubs left in the freezer.

i don't know why i put off making more for so long, but i did. until the nagging from my mother reached monumental levels about freeing up freezer space, i put it off. the sloe gin recipe i use is from the cottage smallholder and i can't help but feel since they put up the recipe in it's entirety, it might be a bit remiss of me to print it here. so this is my sloe gin literally just after it was bottled (i ended up having to buy another bottle of gin and make more, as this used only half the sloes):

if you recognize these bottles you drink too much, so hats off to you, cos i definitely belong in that club too. i use plymouth gin in my sloe gin, as i find the fact it has orange peel and cardamom in it's makeup lend it a sweetness that marries very well with the sweet, almondy taste of the sloes. but i am a gin snob, so if you wanna use the overly citric gordon's, or, and here i shudder, cheap supermarket hooch, do it, just don't tell me about it, because i don't want to know. as you can see the gin takes a while to colour, but after several shakings over the course of a few days it purples up rather rapidly:

so yeah, see you in three months guys, when i'll be enjoying one of the best sloe comfortable screws money can't buy (you can decide exactly how intentional that pun was for yourselves). i will also definitely be trying repurposing the sloes with medium sherry as the recipe suggests, and since i've been raising my game work wise, expect more booze infusions to happen over the next couple of months as i bring my work home with me and turn amateur cocktail artist. because what's better than a ground-up approach to what you put in your mouth? it having the capacity to get you drunk, of course.

right, so onto my adventures in breadmaking. despite my birthday flatbreads success i have still been using the river cottage basic method for breadmaking, just in order to see how different flours behave. i decided to try my hand at spelt bread, and here are the results:

okay, so as you can see, i made smaller loaves, and only shaped them into rounds. why? because spelt is low gluten, so shaping and slashing it wouldn't really do anything. stevens recommends smaller loaves for a better rise, and i do everything he says, as we well know, so i obeyed. these little loaves were monumental with a quick homemade tzatziki to use up an excess of yoghurt, that i totally forgot to take pictures of. i would definitely work with spelt again, although not having stretchy glutens to guide me in kneading was a little unusual.

my next adventure in bread was a little more interesting. while out shopping my mother picked me up a bag of dove farm's malthouse blend; malted flour, rye, and oats. i tend to prefer to mess about with grain blends on my own, but i'm not going to complain about a family member uncharacteristically taking an interest in my cooking, so i decided to use it. having seen the softening effect of using half water, half yoghurt, in my flatbread making, i decided to use that as my liquid, but otherwise, the basic recipe and technique was not deviated from slightly. and look what i was rewarded with:


possibly my most aesthetically pleasing loaves yet. and they were perfect in the eating, too, light brown and studded with chewy oats. i gave one to aled at work, since he enthuses about my bread, and he was incredibly pleased with it. i am getting to the point with my baking where i feel i have mastered yeasts to a foolproof level; and am now pondering alternate methods of working with dough. possible ideas involve buns (it is after all nearly time for the hot cross variety to make an appearance), bagels, and moving on to the slightly nerve wracking environment of oil based doughs. in the meantime i am content to enjoy home made bread with home made soup and the best company i know in this village:


the soup pictured is a tomato based affair flavoured with garlic, onions, oregano rosemary, and fennel seeds, containing white cabbage, savoy, and kale, to clear out the fridge, basically. i just kind of improvised it and finished with oil and freshly ground black pepper. the book pictured is the best thing i've read in about a year. anyway, until next time guys.

09/03/2011

it's my party and i'll cry if i want to.

ok, it feels like a long time since i last posted, but i suspect that's more to do with the busy nature of the past few days than anything else (although, thinking on it, it has been about a week, which is very unlike me). i can only attribute this block in posting to the fact i've been overthinking food on an emotional and political level lately, due to the death of a friend from school last week. when i was a teenager i was hospitalized for quite some time due to depression, and i met this young lady on the hospital ward i was on, although we later attended the same sixth form. she, like many of the other girls i shared that time with, suffered from anorexia nervosa. last week i got to thinking about how i have moved on, and lived my life very differently since. granted, i still have my demons but they don't consume me in the same way they used to. and i've felt very lucky. because carly never got to escape hers. i thought about the things i remember of her, of revising together for our history a level, of me managing to get her to eat something in hospital (a willy shaped biscuit, actually, because i have never been very mature) to avoid her having to have a tube put up her nose, her at my 18th birthday party with all my other friends. i found pictures, and took some time to think about how much it actually just sucks that this disease, which is entirely culturally created, consumed a really sweet, intelligent girl. about how certain young women are so preoccupied with the cultural message of taking up less space in the world that they eventually opt out of it altogether. it made me think, as previously, as a young woman, i have mentioned how hard it is to blot out the noise of media and society and have a healthy relationship with food, my body, and self image, about those who don't quite manage to, and about how those of us who do tend to take it very much for granted. i was beginning to feel a bit guilty for my body politic creeping in on my writings here; but now i can't help but think it would be better to be as vocal as possible in every outlet possible about these things. this isn't just some theory exploration for the intellectual vacuum that is the university, this is the kind of thing that affects, and in the case of carly and countless other young women (and men), ends lives. so from now on i probably won't be apologizing for going off on gender-related tangents, because it isn't me who should be sorry.

anyway the reason the memory of carly just having fun, and being herself with other young people, on my 18th birthday hit me so hard was due to the other thing that was weighing on my mind. on saturday i was 23 years old. i have a bit of a love/hate relationship with birthdays; see for reference any other occasion that makes me take stock of where i am in life such as new year's eve, so i wasn't sure what to expect. i decided the best way to not sit around reflecting on things until i caved, hit the wine early, and ended up emotional pre-midnight, was to focus on cooking up a load of food for my guests. it sort of worked, i didn't hit the wine until gone six, and there weren't any tears until midnight. anyway, there was a lot of food, so i will probably have to spread this over the course of two posts, which actually makes a kind of spatial sense as i divided the cooking over the course of two days. anyway, before i make this post any more of a downer, let's get on to the point of this post, the food that saved my sanity:

flatbreads (recipe from daniel stevens river cottage bread handbook)

makes about 12

500g plain white flour, plus extra for dusting
500g strong white bread flour
10g powdered dried yeast
20g fine salt
325ml warm water
325ml natural yoghurt, warmed.

to knead by hand: mix the flours, yeast, salt, water and yoghurt in a bowl to form a sticky dough. add the oil, mix, and turn the dough out onto a work surface. knead until smooth and silky.

this was my liquids and yeast activating. it looked weird and erratic compared to the normal process, and took a lot longer to show any kind of action, so i was a bit worried that it wouldn't work, but i guess i should perhaps have expected the acid nature of yoghurt to slow down the process, i mean, it was flatbreads we were after here, after all.

shape the dough into a round, then place in a clean bowl. leave to rise, covered in a plastic bag, until doubled in size. deflate the dough, then if you have time, leave to rise for a second, third, even fourth time (this improves the dough but is by no means essential).

this is my dough after it's first rise. you can actually see from the shape of it that it was a lighter and looser dough than the usual bread doughs, as it seems to slump, almost incapable of supporting it's own rise. i gave mine three rises in total and every time it rose higher but became softer and in terms of touch, limper to work with.

tear off pieces the size of small lemons. shape into a round then roll out to a 3-4mm thickness and leave to rest for five minutes or so. this improves the finished bread dramatically.

meanwhile, heat a large, heavy based frying pan over the highest heat and set the grill to maximum. when the pan is really hot, lay the first bread in it. after a minute, maybe less, the bread should be puffy and starting to char on the bottom. slide the bread under a hot grill and watch your creation balloon. it is done when it starts to char on the top. slick some olive oil over it to finish. repeat to use all the dough.


so these are some of the finished flatbreads. they were such a monumental success that i didn't have time to take a picture until over half of them had gone. all my worrying about new techniques in breadmaking (and there was a lot of worrying, believe you me) was for nothing, as, even my mum remarked, i made making these little babies look effortless. that's right you guys, i'm one of those hateful people that doesn't do full on come dine with me style kitchen breakdowns, i just casually fry things off and sling them on the table like it's no big deal. even though these were a very big deal taste-wise. they were possibly the star of the evening. and despite bob's backhanded compliment of 'a kebab would be good in one of these', i think they were the unanimous favourite.

so if you're serving flatbreads, there's got to be something to dip them in, right? on to the next recipe:

Beetroot houmous (again, from the river cottage bread handbook)

1 tbsp cumin seeds
25g breadcrumbs

200g cooked beetroot

1 large garlic clove, peeled and crushed

about 1 tbsp tahini

juice of one lemon

salt and black pepper

toast the cumin seeds in a dry frying pan over a medium heat, shaking the pan almost constantly, until they darken and start to give up their fragrance. crush the seeds using a pestle and mortar or a spice grinder.

add literally everything into the blender and blend until you have a thick paste.

et voila:

i finished mine with a swirl of greek yoghurt and some toasted cumin seeds. i double batched this recipe, and used maybe slightly more lemon juice than i ought; and all in all i kind of wish i'd amped up the garlic, too. having said that i did think this was an excellent variation on houmous proper, and after summer 2010's great houmous challenge (wherein i tried several different variations, some downright odd; broccoli houmous anyone?) i feel qualified as an authority on the subject. which brings me nicely on to:

regular houmous (taken from kirsty's brain, after making 1-2 varieties of the stuff every week for an entire summer)

i eyeballed the quantities of my houmous for the most part, but the ingredients were as follows: one can of chickpeas, the juice of one and a half lemons, two cloves of garlic, a tablespoon and a half of tahini, probably about 50ml olive oil, and a generous dollop of greek yoghurt. why yoghurt, you say? well, it's not traditional but it does give a really good whipped texture. i have tried all-oil variations and all-yoghurt variations, and i have to say i feel like using half and half is the only way to go in terms of both taste and texture. anyways, it's just a chuck-it in the blender until you get a thick paste situation, again.

so here it is:


i finished it with toasted pine nuts, olive oil, and a sprinkling of smoked paprika. again, not strictly conventional, but having tried serving it all kinds of ways in my time, i have settled on this one as the best.

so, that's the first lot of recipes up, my next post will feature falafels, preserved lemon relish, a moroccan carrot salad, and a brief run down of other bits and pieces i improvised. plus probably a hefty side order of my ramblings and over-emoting.

25/02/2011

getting back into shape.

okay, so that ice cream looks amazing. ice cream is absolutely my food achilles heel; it has been since i was little. and i feel ed failed to get across the magnitude of the pistachio moment at gelupo. i am actually fanatical about pistachio ice cream, ever since my dad introduced me to it on some forced-cheer family holiday where i must have been somewhere older than five and younger than ten. i used to live on the south coast, as keen readers of this blog will know, and a scoop of pistachio, or hazelnut if there was a drought, was never more than stroll down the seafront away. and it was the good shit, from a company called minghella, based on the isle of wight, with several concessions along southsea seafront and old portsmouth. things have changed now i'm in the semi-rural midlands. pistachio here comes out of a tub, and only from the more archly middle-class supermarkets at that. walking into gelupo and semi-drunkenly enquiring as to whether there was any pistachio only to be met with a 'just finished some...look!' was beyond a stroke of luck, it was a 'truly, the gods have smiled upon today' moment. you don't even need to ask if it was good. of course it was good.

anyway, so my last post was uncharacteristically wide-ranging in its outlook, as occasionally my politics and arts education impact my interaction with oh, basically, everything. and i'm not saying that's going to stop any time soon, but after a morning of battling the hormone-demons and painting my nails during my like, millionth rewatch of stop making sense, i'm back in a place where i can talk about what is becoming quite an intensely personal working relationship in the kitchen for me. that's right folks, i'm talking about my adventures in breadmaking.

i didn't write an in-depth post about last week's bread, because not only was i in a totally shitty mood, but all i really did was change up the basic wholemeal by adding mixed seeds (sesame, sunflower, pumpkin, and fennel). i only made a half batch because that's all the flour i had in the kitchen, and in the process i learned it is actually far easier to be working with a kilo of dough than 500g. i ended up with two loaves, both happily perfect:

the loaves have the seeds kneaded in to the dough toward the latter stage of the kneading process, and were also rolled in milk, then in the seed mixture before baking. as i say, there was no real need for an indepth post for so basic a variant, but this week's batch is an altogether different kettle of fish. i chose one of daniel steven's variants on the basic technique, from the river cottage bread handbook, so i'll give you the ratio of ingredients needed, but the technique is the same as the basic recipe throughout:

hazel maizel bread

800g wholemeal flour
200g maize meal (also known basically as cornmeal to those of us not looking for cutesy rhyming names)
300ml apple juice,
300ml warm water
1 tablespoon honey, to be stirred into the liquids,
10g dried yeast
10g salt,
1 tablespoon melted butter
2 handfuls lightly bashed hazelnuts,
few handfuls flour to coat.

okay, so onto the process of working with the bread. this was my first time deviating from just using water as the liquid, and i was basically amazed (although given exactly how much homework i have done to get national qualifications in cask ale and wine i shouldn't have been) at the effects the sugars in the apple juice had on the yeast:

look at that. you got a good half centimetre of foam, minimum, all over. one of the things that has been hotly debated behind the scenes here at pot tossery is food and science, as filtered through heston 'i'm considerably smarter than you' blumenthal, who, the intuitive of you will have already guessed, i have absolutely no time for whatsoever. i don't appreciate the artistic qualities of food being fetishized, and neither do i appreciate the same process being applied to food's scientific properties. i feel, in fact, that heston's smug appropriation of scientific processes home cooks have been using for years, creates a kind of academic level of distance that actually intimidates more people away from cooking than it does interest them. and given how firmly i believe in widely available information and education, you can imagine how grossly irresponsible i find heston's niche specialism being a part of the mainstream cooking canon. i told you guys i was the more cynical one here.

wouldn't it be better just to discuss the processes at play in a more frank way, with a more pragmatic and obvious link between cause and effect, and a whole lot less dry ice? for example; look how insane yeast goes if you give it sugar to feed on, you are gonna get some serious air going on in that bread compared to a water based one, let's see how it worked out, shall we? pre rise dough:

aaand, post-rise dough:

that is the stuff, people. that is what i am talking about. this dough was gloriously airy. the more you work with bread, the more you train yourself in the tactile aspect of cooking; it's possibly the most hands on, responsive cooking i can think of, and this stuff was a dream to work with in terms of yield and feel.

right. now, i have previously lamented my lack of ability to take process pictures for you of vital stages such as knocking back and loaf shaping, but i figured since i was using forgiving wholemeal flour, and had enough yeast action going on that i could afford to gamble on losing a tiny bit of rise here, that i would try anyway. i am completely aware of how useless i am with a camera, and that consequently these pictures may not be much use in themselves, but describing a process entirely verbally tends to result in confusion, and consequently if they're as terrible as i think they are, just think of them as vague ciphers. i mean, if you can put something together using weird ikea diagrams, this should be a walk in the park:

this is what dough should look like post-knocking back. knocking back implies a heavy handed process, but really, you should be using light pressure with your fingertips to squash the air out of the dough, until it is roughly half the size it was in it's risen state. the more eagle eyed amongst you might have notice tiny little half moons all over the cratered landscape of my dough; what can i say? i rock a fierce set of talons. you should actually be able to hear the tiny, relaxed snap of bubbles popping here; it's like bubblewrap for hippies. and now, onto the matter of loaf shaping, something i haven't previously addressed, which is muchos important for your finished rise. you divide the dough into three rounds (shaping a round is something i have yet to get snaps of, but honestly, it's not a vital step in proceedings at this stage), for your three loaves, and shape each accordingly:

flatten out your piece of dough, similar to the knocking back process (see them half moons again? i told you. fierce.)

roll it, really very tightly, using your thumbs and the heels of your hands, towards you. this stretches the glutens in the underside of the dough, as what you're effectively trying to do is make your glutens work for you to aid the rise here.

okay, take one end of your sort-of sausage shape; and fold it about a third of the way onto itself. fold the other end over that. again, you are stretching the glutens on the underside of the piece to put more spring in.

flatten this out again, gently, with your fingertips.

then, roll the longest edge towards you, using your thumbs and the heels of your hands again. you should have stretched the glutens in several directions, which will result in an even rise in all directions. and that's your basic loaf shaping 101. you pop them seam-under to prove freeform, or seam-up to prove in baskets.

so, the finished product should look like this:

unless of course, your top oven is actually out to fuck you up, in which case you'll end up with one that looks like this:
...in which case you utter a string of profanities, tear into it while it's still warm, and devour the still-delicious evidence with your mother.

i am definitely feeling more confident in my breadmaking these days, i think after a dalliance with low-gluten flour such as spelt and rye, i may well progress onto variations in technique. i reckon about a month's time, maybe, for that? once i've gotten completely comfortable working with yeast in this context i'll then move on to wild yeasts. the bread itself was amazing; i love hazelnuts in general, and i feel like the cornmeal lightened up the malty quality of the wholemeal flour, while the air in the bread because of the sugars made it almost shockingly light given the heavy nature of the flour involved. it worked well with honey, naturally, apple jelly, also naturally, and bizarrely, as toast with scrambled eggs. anyway, until my next novel, i mean, blog post, i bid you adieu, dear readers.

13/02/2011

Bread, you say?

So I'm sort of muscling in on the bread making, albeit only temporarily.  It's about time I posted something else here, anyway.

I'd only ever made bread a couple of times before, and these efforts were by no means amazing, but also by no means a disaster, to the extent that I have no further recollection than that they happened.  The focaccia recipe from River Cottage Every Day caught my eye when I first bought it, but I'd never got around to making any until my friend Tim told me to 'bring something tapas-y' on New Year's Eve just gone.  Given the circumstances in which one would buy focaccia, ie not just for toast and things I've ended up not really ever having had a bad one, so my standards and expectations of what one should be like were pretty high.  Which made it even more satisfying that the one I made was amazing.  My friend John went to the extent of proclaiming it 'the best bread I've ever tasted'.  And you know what, I probably wouldn't go that far, but it was definitely up there.  It looked amazing as well.  My mum got very jealous (you know, like kids do when they don't get any of something made for a party, which this was) so I was subsequently told to make some more two days later.

So anyway, Tim and his girlfriend Emma just moved into a new flat and dutifully had a convivial evening to warm the place.  I was told to bring focaccia.  I'm not sure if ever my invitation was riding on this, but it's not like I objected or anything.  In fact I took it as an opportunity to try it a little differently.

The original recipe, from Hugh Fearnley-Whittingstall's River Cottage Every Day.

500g strong white flour
10g fine sea salt
5g dried yeast or fast-action yeast (I used dried, it's easier to come by)
2 tbsp rapeseed or olive oil (I used rapeseed, and have done each time I've made this)

To finish:
Rapeseed or olive oil
Flaky sea salt
Leaves from 2 sprigs of rosemary, finely chopped

Put the flour and salt in a large bowl and mix together.  If you're using ordinary dried yeast, dissolve it in 350ml warm water.  If using fast-action yeast, add it straight to the flour.  Add the yeast liquid or 350ml warm water to the flour and mix to a very rough, soft dough.  Add the oil and squish it all in.

Scrape the dough out on to a lightly floured work surface.  With lightly floured hands, knead until it's smooth and silky - anything between 5 and 15 minutes.  As it's a very sticky dough, you'll need to keep dusting your hands with flour; it will become less sticky as you knead.

Shape the dough into a round, put it in a lightly oiled bowl, then cover with lightly oiled cling film or a clean tea towel and leave to rise until it has doubled in size; this will take about an hour.  Knock back the dough and, if you have time, leave it to rise again in the same way.  Meanwhile, lightly oil a shallow baking tin, about 25 x 35cm.

Press the dough out into a rough rectangle on a floured surface, then lift into the baking tin and press right into the corners.  Cover with oiled cling film or a tea towel and leave to rise for about half an hour.

Once risen, use your fingertips to poke rows of deep dimples across the surface.  Trickle the top generously with oil, then sprinkle with salt and rosemary.  Bake in the oven preheated to its highest setting (at least 230°/Gas Mark 8) for 15-20 minutes, turning it down after 10 minutes if the focaccia is browning too fast.  Serve just warm, or let it cool completely.

Variations
Knead some chopped black or green olives and/or sun-dried tomatoes into the dough after the first rising.

Dough pre- and post-rising;


The first two times I made the unadulterated, non-variation version and due to time constraints only gave it one rise.  This time I decided to make two, one normal, one olive variation.  Also thanks to making this while watching the England v Italy Six Nations game, I had time to give both a double rise.  The olive dough needs a second rise in any case after you've kneaded the olives in, otherwise it won't have the required volume to stretch to fill the baking tin.  I also read something somewhere recently (can't for the life of me think where) about how bowls freshly washed in ridiculously hot water transplants heat to the dough and aids rising, so I gave that a try, washing the bowls between mixing and rising.

Finished articles, normal and olive varieties (plus side elevation of olive focaccia to demonstrate just how bloody high it was)


These additional elements resulted in the bread rising during baking about twice as much as the previous two I'd made (and also significantly more than the one pictured in the book).  Both were raging successes.  I took half of each to Tim and Emma's, and they were both demolished.  I think the normal version will always go down better than olive or other variations, which I'd agree with, although that is not to detract from olive focaccia as the combination of oil, salt and rosemary is just perfect and doesn't really need any further embellishment. 

10/02/2011

variables.

so; last week was missing a bread post. and the reason for that is because last week i spent the earlier half of the week either drunk or hungover, due to visiting ed in our country's fair capital (christened by me as Everything Everywhere in some vague conversational sarcastic moment when i was delineating the difference in our living situations, or something. don't ask). well, that and my previous efforts had exhausted 3kg of bread flour, and consequently i had to make a tactical decision on how to vary my endeavours; stick with technique perfection and vary the flour variety? or perhaps try a new technique? i decided, in the end, to stick with the basic technique i have been working with from the river cottage bread handbook, and change up the flour. the reason i went for this decision is because (and this blog is increasingly highlighting this for me, although it's a personality trait i've been somewhat aware of all my life), i do not feel yet that i have achieved a level of skill in the basics that is adequate for me to say i am good enough at it. now i'm just gonna throw the word perfectionist in there, and leave you all to draw your own conclusions. it may also shed light on why every university essay i ever wrote was on books i had already read repeatedly, and why i immediately gave up on things that caused me any great frustration during the learning process in my youth (we're talking guitar and violin lessons, maths homework, the usual suspects here). i have developed a technique of playing almost exclusively to my strengths that helps to shape the way people see me as a person, which isn't news to me, but the fact it's mirrored so strongly in my cooking? that really is.

so anyway, i decided, in keeping with my approach, to go as basic in my variation as to simply try my hand at brown bread, instead of white. there was only one change in the basic recipe suggested for this, and that is that the fat you use should be melted unsalted butter, not oil. it seems counterintuitive to use a gentler fat with a more robust grain on many levels, but brown flour has such a strong, malty character that you need something gentle to soften it.

as per my last batch i took process pictures. it's unfortunate that i don't have anybody else around during the day to help me, i would actually really like to get pictures of things like the shaping process as it's fairly technical and better described pictorially, but obviously my hands are busy, so i can only show you the passive stages of the process, when the yeasts and glutens need to be left to their own devices.


so here is my dough once kneaded. i found a couple of key differences with brown flour. one is that it needs more water than the ratio of 1kg flour = 600ml water to come together properly, but i expected that. i played it by eye so i couldn't tell you how much, but it was somewhere between 50-100ml. the other significant difference is that initially the dough is much more difficult to work with. not just on a resistance level, which, again, i expected, but in terms of the flour being rougher, making it more difficult to see the glutens forming and stretching. you have to work a lot more by feel until they get a bit more well-developed.

and this is my risen dough. i do exactly as the book tells me, popping a carrier bag over the bowl to provide an airtight environment for the bread to rise in, although i have also discovered something which i think gives the bread an extra kickstart, almost by accident. you can plainly see i am using the same bowl i mixed the dough in, right? the more awake among you might have spotted it gets used for almost everything i do; it was the bowl my mother and i used to use when she baked with me when i was little, the only real kitchen experience i had before university. i have a tendency to get attached to things that have absorbed stories, see for reference the fact that when my great grandmother died all i wanted were a few pieces of kitschy seventies china that had long since outlived the set they came in, that i remembered from when i was little. part of it is the literature student in me; i like to surround myself with narrative. anyway, ahem, i digress. obviously in the initial mixing process, the bowl gets all doughy and whatnot, so you have to wash it if you want to reuse it. and i might have mentioned that waitressing and handling glasswasher-fresh glassware have blessed me with asbestos hands? so i wash it in savagely hot water. the earthenware bowl then retains the heat, and gives that extra boost your rising process needs in a february kitchen. that's a lot of tangents for a tiny bit of accidental science i found, right? right.


proving loaf number one, relying purely on belief and a teatowel. what a little trooper. i did have some cotton proving cloths i sewed myself, but i'm not actually sure where i put them, so interdisciplinary bragging will have to wait for another day.

proving loaves number two and three, happy in the support of loaf tins and teatowels. they may have privilege, but i expect all the more from them for it when it comes to crunch time.


LOOK! i am so proud of this batch it's not even funny. again, insta-text to ed about it, who in an understatement of the century said i seem to have an 'affinity' with my bread. call it more like the heart-burning joy i used to get from getting firsts in essays, or acceptance letters, or whatever it was i used to burn myself out for months for. just without the soul destroying low the day after when i realized it wasn't enough. it's really that major a feeling, bringing these little babies out of the oven and thinking 'i did that from beginning to end'. i might sound crazy, but i get a lot of satisfaction from seeing something i have created entirely by myself turn out so beautifully. the little one in back is the freeform proved one, and the one in front is one from the proving baskets.

although, every family has to have its black sheep. this one was baked on the floor of my top oven, to try and get a stonebaked base going on. which totally worked, but as you can see it has tried to exit its' own skin via the slashes. it tasted perfect, and was the first one to get eaten, but it just didn't have the good looks and grace of the other two. i can only think that the heat on the base caused more oven spring in the initial rise so i should have slashed both more, and more horizontally.

still, overall i'm happy with the improvements i'm seeing, and every time i do this i learn more lessons about the process. the bread itself tasted incredible; i actually prefer brown bread anyway but this stuff was glorious, i used it, still warm to mop up the juices from a mixed mushroom pan fry i made out of laziness that was heavy on garlic and butter, and it was so good. fully cooled i've been eating it a lot with brie and honey, cos its flavour profile is a long the lines of oated things; it straddles the line between sweet and savoury, not piling its lot in with either, and therefore working majestically with both.