...I'm an achiever. Or something like that. Anyway, enough cultural references as this is going to be my last entry on here and I'm going out on a high. Without giving too much away. I've done that before. But not the sort of high where you start kicking tortoises.
My friend Phil, City Boy that he is embarks on a period of Non Drinking from January onwards each year as a kind of detox response to the Silly Season of drinking about three times your own body weight in alcohol at about ten parties a week for the three months prior to Christmas. So every time since then we're approaching the Bell and Hare in Tottenham on a weekend and I ask him if he's back on the booze yet it is quickly rebuffed with something like 'no, I'm extending it another month'. This went on till about March some time with the announcement that his previously privately held 'Phil and Rob's International Beer and Chilli Festival' would be opening itself to the public (invitation only, of course) this year, and that this would mark, at least temporarily, a brief regression until the wagon returned to give Phil a lift somewhere. So what happens at an International Beer and Chilli Festival, one might ask? You drink International Beers and eat chilli. It's competitive. Intrigue. Excitement. Obviously I had to win this thing, so I had to get a pretty awesome chilli going.
This makes enough chilli for a competition with about ten judges, or for two hungry people.
500g chuck steak in roughly 1in dice
1 large onion
2 cloves garlic, minced with coarse sea salt
1 large green chilli
1 tbsp molasses sugar
2 tbsp cider vinegar
2 tbsp chipotles en adobo
400g chopped tomatoes
125g red kidney beans
200ml red wine
2 tbsp olive oil
1 piece mace
2 bay leaves
1 cinnamon stick
1 star anise
2 tsp ground cumin
1 tsp ground cloves
1 tsp ground allspice
1 tsp ground corriander
Salt and pepper
Soak the kidney beans overnight in cold, unsalted water. Drain, then place in a large pan of fresh cold, unsalted water. Bring to a rapid boil and cook for around 2 hours, skimming off any foam when necessary. Add a pinch of salt about 10 minutes from the end.
Preheat the oven to 140°C/120°C fan/Gas mark 1.
Heat the olive oil in a large, heavy based saucepan. Fry the steak until browned all over. Remove from the pan and add the chopped onion and garlic. Soften for around five minutes, then add the green chilli and star anise and season with salt and pepper. Cook gently for a further five minutes, then add the remaining spices. Once the dry spices have mixed into the onion and garlic, add the sugar, vinegar and chipotles. Return the meat to the pan along with the chopped tomatoes and wine and season again. Bring to the boil, then cover and move to the oven and cook for at least two hours. At this point add the cooked and drained beans and cook for a further hour. When ready, shred the meat using a pair of forks. Serve with rice or crusty bread.
I road tested this recipe a week before the competition, in which I used some remaining veal stock I had in the freezer. As it was the last lot I had, I used wine for the Competition Chilli. Both have their advocates. Either would be fine, or beef stock in place of veal, or even a combination of the two. Tinned beans are also fine, although the texture isn't as nice as the method above. Although if you do use dried beans, make sure you don't do what I did whilst making the Competition Chilli and totally forget to boil them before adding them. If you do, you will then have to painstakingly pick out every bean, rinse them then give them a rapid boil for another hour or so (they'd been cooking in the chilli for about an hour when I realised this). In a thoroughly pleasing case of things happening together, my chilli was ready and the Grand National finished right at the same time that I needed to leave.
So, to the competition. Although there was no one running a bookies, I sensed that I had been installed as some sort of pre-tournament favourite and had big expectations to live up to. As numerous chillies arrived it was clear that this wasn't going to be an easy competition. Each chilli was arbitrarily assigned a letter by an impartial non-entrant, in this case Kelly. Scores were given out of ten for Appearance, Aroma, Flavour and Texture. All important aspects of a chilli, you will no doubt agree. The competition was stiff, as was proved by the lengthy period of time taken for all the scores to be added up, a recount taken, until finally the results were in. You could cut the tension with a knife. No one did, though, as we were all stuffed with chilli (and pulled pork - if you ever wondered who would bring a knife to a gun fight, try pondering who would bring pulled pork to a Chilli Competition? Except that in this case, the pulled pork was awesome and well worthy of its honorary prize for Best Pulled Pork.)
And so, the award for Best Appearance went to... Ms Susie Mangan, for a very fine appearing chilli. The award for Best Aroma was taken by... myself, and even if I must admit myself, it smelt pretty damn good. The award for Best Flavour went to Ms Emma Dalby's Butternut Squash and Black Bean Chilli, and the award for Best Texture was a triumph for co-host Mr Rob Hayward. Which left (Best Pulled Pork award aside, take a bow Mrs Stephanie Fox, and Award for Least Effort for Scott Heywood-Smith's tinned entry) the main event, the Best Overall Chilli Award. As there was a recount, we knew it would be close, and with four separate winners already, it could be anyone's title. More specifically, it was mine. I don't have any pictures of the chilli itself (and after all, it wasn't even the Best Appearing Chilli) just this rather splendid certificate congratulating me on being an achiever. There were photos of award acceptances, but the food always does the talking.
So consider this a guide to How to Win at Chilli Competitions. Unless, by some coincidence two people read this, follow it and enter the same chilli competition. In which case it is merely a guide to How to Tie for First at Chilli Competitions.
what happens when a girl living in the midlands and a guy living in london meet via the internet and spend all their time discussing food? this does.
09/05/2012
07/04/2012
A Kitchen (Cupboard) of One's Own
Hello boys and girls. Here we are then. It's been nearly a year since I last updated, and back then I made mention of a pivotal, life-changing moment on the horizon in my life. I have to say that the moment has happened, via job interviews all over the capital, and I have forsaken my rural pub life and garden stickery-pokery for a citydwelling existence, just like that of my esteemed blogging partner/boyfriend.
I was in dialogue with an acquaintance from my south coast years yesterday, and when it occured to me that he had no inkling that Ed and I have been in a relationship for over a year now, I realized a little catch up session might be due (especially since my about me page on this blog now contains many errata). so, here goes:
One
I have been out of northampton since about August/September last year. I spent most of the latter days of last summer going to interviews across the capital, trying to get out of my village-pub rut in order to gain a position where I might be able to progress in the hospitality industry. It paid off, and I got one, and now work for big hitting London brewery, Fuller, Smith and Turner.
(My windowsill collection of carefully nurtured supermarket herbs, and also if you look closely you can see the yellow teapot Ed bought me as a housewarming present)
Two
My London existence started off just outside of zone 6, where I lived with my most-obliging grandmother in Potters Bar, while I built up some money and got myself used to my new pace of work. I had no real internet connection at this time, and since I was relying on the kindness of a relation, I had no real desire to create kitchen chaos and make myself a disruptive houseguest. I didn't do an awful lot of cooking in that period, in fact, the whole time felt as though I were in a kind of stasis, waiting for things to happen and living on the hoof. I pretty much exhausted myself flathunting the whole time, travelling north london in it's entirety, or so I felt.

(My new shared kitchen, warts, Pantera sticker, and all. It's my aim to get this to be a busy, communal space in the house, that's a pleasure to be in)
Three
I finally lucked out, and in february I moved into a houseshare with four other people in their twenties in Muswell Hill. It's not in ideal condition, but it's cheap, and it's one of those character-ridden properties that someone last had a stab at decorating in the early seventies that I always seem to end up living in. One of the things that sold me on the place was the kitchen. Not for the beauty of the place (although I'll admit to enjoying the yellow and brown palette and outmoded decor a lot more than i probably ought), but for the space, and the layout, and the fact that it seemed like it would be a joy to cook in. I have been getting to know my kitchen, the area, and my housemates, and vowed that as soon as my internet access was restored, that food-blogging would resume with renewed vigour.
I have so many plans for this kitchen, and for the space I have out back and in front of the property that catches so much sun it would be rude not to grow edibles in containers, and Muswell Hill itself is particularly stimulating for those of the foodie persuasion. It has amazing greengrocers, ethnic groceries (am i the only one who feels it's inappropriate to say that, by the way? it seems kind of racist. preferred terms on a postcard please), and health food shops, a cheese shop, a wine shop, a kitchen equipment shop, an organic supermarket, and branches of the more food-concerned big box supermarkets.
It has been amazing bringing my country girl nesting instinct to the big city, and actually finding that despite commutes, longer working hours, and so many reasons to be out and about, a slow-paced home life is actually possible. I do often feel that my desire to put down even temporary roots, is at odds with the attitudes of the nomadic, bustling people around me in London, but I am working on cultivating a small, handcrafted corner of the world for myself, and enjoying the process. It is of course, also wonderful to be cooking without anyone expecting me to say, be eating at a certain time, or eating certain things. It's like regaining total creative control. it's wonderful.

(my first seedlings, L-R: chives, spinach, spring onions, leeks, tomatoes)
Four
I have to say, massive sap that I am, that my favourite thing about moving to London is the increased proximity to aforementioned esteemed blogging partner. It will come as no surprise to hear that the couple who run a food blog together probably work best as a partnership when in the process of sharing/discussing/consuming/creating food and drink, and being in London is something that has made the process of cooking and eating together a much more regular experience. Whether in or out, it's always varied and interesting, from pizza and pinot noir in front of a film, to the incredible raspberry and pistachio macarons ed made me for my birthday. the context in which food is eaten is, to me at least, with my continued affection for stories, just as important as what is eaten, and i can't think of anyone i'd rather be breaking bread with than Ed.

(One of the first few batches of bread made in the kitchen here, with wholemeal organic flour, apple juice, sunflower and pumpkin seeds, and coated in oats and sunflower seeds)
When I think about how I got here, and how fast everything has moved, I have to remind myself that it's real, that i'm actually living this. it's great to be back out in the wider world on my own, and rest assured, readers, that rather than leaving Ed to hold down the fort, which he#s been doing masterfully, i will be here, reporting back on as many dishes cooked and eaten as is physically possible.
I was in dialogue with an acquaintance from my south coast years yesterday, and when it occured to me that he had no inkling that Ed and I have been in a relationship for over a year now, I realized a little catch up session might be due (especially since my about me page on this blog now contains many errata). so, here goes:
One
I have been out of northampton since about August/September last year. I spent most of the latter days of last summer going to interviews across the capital, trying to get out of my village-pub rut in order to gain a position where I might be able to progress in the hospitality industry. It paid off, and I got one, and now work for big hitting London brewery, Fuller, Smith and Turner.
(My windowsill collection of carefully nurtured supermarket herbs, and also if you look closely you can see the yellow teapot Ed bought me as a housewarming present)Two
My London existence started off just outside of zone 6, where I lived with my most-obliging grandmother in Potters Bar, while I built up some money and got myself used to my new pace of work. I had no real internet connection at this time, and since I was relying on the kindness of a relation, I had no real desire to create kitchen chaos and make myself a disruptive houseguest. I didn't do an awful lot of cooking in that period, in fact, the whole time felt as though I were in a kind of stasis, waiting for things to happen and living on the hoof. I pretty much exhausted myself flathunting the whole time, travelling north london in it's entirety, or so I felt.

(My new shared kitchen, warts, Pantera sticker, and all. It's my aim to get this to be a busy, communal space in the house, that's a pleasure to be in)
Three
I finally lucked out, and in february I moved into a houseshare with four other people in their twenties in Muswell Hill. It's not in ideal condition, but it's cheap, and it's one of those character-ridden properties that someone last had a stab at decorating in the early seventies that I always seem to end up living in. One of the things that sold me on the place was the kitchen. Not for the beauty of the place (although I'll admit to enjoying the yellow and brown palette and outmoded decor a lot more than i probably ought), but for the space, and the layout, and the fact that it seemed like it would be a joy to cook in. I have been getting to know my kitchen, the area, and my housemates, and vowed that as soon as my internet access was restored, that food-blogging would resume with renewed vigour.
I have so many plans for this kitchen, and for the space I have out back and in front of the property that catches so much sun it would be rude not to grow edibles in containers, and Muswell Hill itself is particularly stimulating for those of the foodie persuasion. It has amazing greengrocers, ethnic groceries (am i the only one who feels it's inappropriate to say that, by the way? it seems kind of racist. preferred terms on a postcard please), and health food shops, a cheese shop, a wine shop, a kitchen equipment shop, an organic supermarket, and branches of the more food-concerned big box supermarkets.
It has been amazing bringing my country girl nesting instinct to the big city, and actually finding that despite commutes, longer working hours, and so many reasons to be out and about, a slow-paced home life is actually possible. I do often feel that my desire to put down even temporary roots, is at odds with the attitudes of the nomadic, bustling people around me in London, but I am working on cultivating a small, handcrafted corner of the world for myself, and enjoying the process. It is of course, also wonderful to be cooking without anyone expecting me to say, be eating at a certain time, or eating certain things. It's like regaining total creative control. it's wonderful.

(my first seedlings, L-R: chives, spinach, spring onions, leeks, tomatoes)
Four
I have to say, massive sap that I am, that my favourite thing about moving to London is the increased proximity to aforementioned esteemed blogging partner. It will come as no surprise to hear that the couple who run a food blog together probably work best as a partnership when in the process of sharing/discussing/consuming/creating food and drink, and being in London is something that has made the process of cooking and eating together a much more regular experience. Whether in or out, it's always varied and interesting, from pizza and pinot noir in front of a film, to the incredible raspberry and pistachio macarons ed made me for my birthday. the context in which food is eaten is, to me at least, with my continued affection for stories, just as important as what is eaten, and i can't think of anyone i'd rather be breaking bread with than Ed.

(One of the first few batches of bread made in the kitchen here, with wholemeal organic flour, apple juice, sunflower and pumpkin seeds, and coated in oats and sunflower seeds)
When I think about how I got here, and how fast everything has moved, I have to remind myself that it's real, that i'm actually living this. it's great to be back out in the wider world on my own, and rest assured, readers, that rather than leaving Ed to hold down the fort, which he#s been doing masterfully, i will be here, reporting back on as many dishes cooked and eaten as is physically possible.
19/01/2012
A Pot Tossing Christmas
It's actually just over a year since Adventures in Pot Tossery came into existence, along with a flurry of activity. It's been a bit quiet of late, but this should set things back on track a bit as I've got a few things worthy of writing about from, ahem, Christmas. Obviously there's no How to Roast a Magnificent Turkey in mid-January and this is a mere Look at What I Done type blog. Which does mean there's no room for some prick to announce that Ainsley Harriott makes the best Christmas Dinner, and that straining is a Very Chefy Technique well and truly beyond the culinary repertoir of mere mortals. So, begin Pot Tossery Christmas.
I had initially planned to make croissants for Christmas Day breakfast, but having read the recipe beforehand and seeing how stupidly long they take to make (overnight resting, several hours rising, plus shaping, cutting, folding etc) I decided on bagels instead. With a comparatively paltry single rise and prove making for about a couple of hours total, this at least meant I wouldn't have to get up at about 4am (and risk walking in on Santa coming down the chimney). Plus bagels are better than croissants anyway. Both potential croissant recipe and pervading bagel recipe came from Mr Daniel Stevens' River Cottage Bread Handbook.
Bagels
500g strong white bread flour
5g powdered dried yeast
10g fine salt
250ml warm water
20g caster sugar
50ml vegetable oil, plus extra for coating
To finish
1 medium free-range egg, beaten
Poppy or sesame seeds (optional)
In a large bowl, mix together all the ingredients to make a dough. Knead on a clean surface until smooth and elastic. Shape into a round, coat with a little extra oil and place in a clean bowl. Leave to rise, covered with a plastic bag.
When the dough has doubled in size, deflate it and divide into 12 pieces. One at a time, roll into a sausage shape, about 15cm long. Wet the ends and press them together to make a ring. Leave to prove, covered, on a lightly oiled plastic board or metal baking sheet (not floured cloths or boards).
Preheat the over to 200°C/Gas Mark 6. Lightly oil a couple of baking sheets and in a wide pan bring around a 10cm depth of water to the boil.
When the bagels have roughly doubled in size, they are ready for poaching. You will need to do this in batches. Turn the pan of water down to a simmer, then slip as many bagels as will fit comfortably into the water (allow room for them to puff up). Cook for a minute on each side, then remove and drain on a clean tea towel (not kitchen paper as it will stick).
When they are all poached, lay the bagels on the baking sheets, gently sticking any that uncurled in the water back together again. Brush all over with beaten egg, then sprinkle with seeds if you like. Bake for 15 minutes, until the bagels are a uniform, glossy golden brown. Cool on a wire rack.
So I got up early to make the dough and left it to rise whilst I then got up properly. There are no pictures of me making dough in my boxer shorts, as after all, I let the food do the talking. The dough didn't seem to be rising a huge amount, either in the initial rise or the proving stage, and I must admit to thinking 'sod it' after an hour's rising and 20 minutes proving, not least as I, and others were getting hungry, including my brother and cousin who for some mental reason had decided to run 5km on Christmas Day morning. Subsequently I was expecting rather small little bagels, until the poaching stage. I was a bit unsure as to whether 10cm of water would be sufficient, and remembered that Nigella has a recipe for bagels in How to Be A Domestic Goddess. A quick cross reference showed that Nigella suggests using a large pan, so I sided with her on that one. Sorry, Dan Stevens and all present Dan Stevens-ites. (Nigella also uses malt in the poaching water to obtain the shiny crust rather than beaten egg - time for some comparison next time I think.)
Anyway, they puffed up pretty well, almost doubling in size and then looked amazing once they came out of the oven. Flipping bagels in water is pretty satisfying, really. I'd had to make an extra trip out on Christmas Eve in search of poppy seeds for these, and a few other bits for other things (expected to take ages, hardly took any time at all as there was virtually no one out at 9am), and whilst they don't make a huge difference taste wise, I think they make them look that much more impressive. If I can make myself get up early more often at weekends then I think I will find myself making these with increasing regularity.
Next, ice cream. As I mentioned in my last post there's something about making ice cream at Christmas which meant I had to make some. I'm actually writing about these chronologically in the order I made them, I'm not sure whether that was intentional or accidental, but anyway.
On my second visit to Bocca di Lupo I'd told myself I wouldn't have anything I'd had the first time. This was all fine until the pudding stage where I was sorely tempted to go against my intentions and have the Sanguinaccio again. Eventually I held firm and instead had a brioche gelato sandwich with pistachio, hazelnut and chestnut gelati. This is almost certainly the best gelato flavour combination I've ever tasted, and despite the near deific regard in which Gelupo's pistachio ice cream is held in these parts I came away most impressed by, and most fervently remembering the chestnut. So, wanting to make some kind of festive, or at least appropriately seasonal ice cream, and recalling this I stumped for chestnut. There's no exact recipe in the Bocca book, but there are ones which can be easily adapted. I took the one for pistachio and simply replaced the pistachio paste with chestnut purée.
Chestnut Ice Cream
500ml whole milk
140ml whipping cream
40g glucose syrup or light runny honey
130g caster sugar
40g skimmed milk powder
3g leaf gelatine (1 large or 2 small leaves), or 4 teaspoons agar-agar
85g chestnut purée
45g icing sugar
For the base bianca, put the milk, cream and glucose or honey in a pan. heat over a low flame and, in a separate container, mix together the sugar and milk powder. When the pan is steaming, add the sugar mixture in a steady stream as you stir. When the mixture approaches a simmer, remove it from the heat and add either the gelatine (already bloomed for a few minutes in cold water, then stirred into the mix) or the agar-agar (sprinkled on top of the hot mixture and left for 5 minutes, then stirred in). Leave to cool, covered, to room or fridge temperature.
Blend the nut paste and icing sugar into the base bianca and freeze in an ice-cream machine as usual. For the creamiest texture let the gelato freeze as hard as it will go in the machine before taking it out.
I actually find it hard to go into much detail with this. Apart from the flavouring, this is pretty much the same ice cream recipe and procedure as my last ice cream post, only even simpler. And having the amazing ice cream machine meant I could set it going just before we sat down for Christmas Dinner and it made itself and was ready pretty much bang on time. Additionally, the tin of chestnut purée we'd harassed the Waitrose staff into finding for us had plenty more than was needed for one batch, so I made some more a couple of days later to go with a Nigel Slater cheesecake recipe I'd pulled from the Observer Food Monthly. This is without doubt the best ice cream I've ever made.
A few weeks prior to Christmas I'd seen a repeat of the previous year's River Cottage Christmas Fayre, where Gill and some others enter a gingerbread house making competition. For seemingly no other reason than 'that sounds cool', I there and then decided that I too would make a gingerbread house. So...
On Boxing Day we usually have tea followed by numerous sweet things of the cake and biscuity variety in the evening, so that seemed the ideal time to make it. As it was, with Christmas cake and what not, the house was left until the day after, only a small amount in part to not wanting to demolish it straight away. I'd hunted down that episode on 4od and watched that section a couple of times - the recipe is incredibly straight forward, so really the only thing to really think much about is one, how big to make it, and two, what to decorate it with. As a beginner in Gingerbread Masonry, I decided not to get too carried away and stuck to a four-walled, box-shaped house. Looking around, some people make some quite frankly ridiculous things out of gingerbread, and after all, you never want the aesthetical aspect of the thing to get in the way of the 'mmmmm, gingerbread' aspect.
For your bricks you will need;
1kg flour
300g muscavado sugar
10 tbsp golden syrup
1 tsp treacle
400g butter
2 tsp ground ginger
2 tsp bicarbonate of soda
And for your mortar you will need;
2 free range egg whites
400g icing sugar
Plus various sugary things to decorate
Preheat the oven to 180°C. Melt the butter, sugar, syrup and treacle together. Once combined, pour into the flour, ginger and bicarbonate of soda and mix until a dough is formed. Roll out the dough on a piece of baking parchment until about 5mm thick. Draw out templates for the walls and roof and use them to cut out the dough. Bake for 15 minutes, then leave to cool and harden.
For the royal icing/cement, whisk the egg whites until frothy, then add 300g icing sugar and whisk until thick and glossy. Add the remaining icing sugar and beat until soft peaks are formed. Add more icing sugar if required.
Watching that part of the program over again before making it the house they made looked much bigger than what I needed, so in the end I made three quarters of the amount and it came out pretty much the perfect size. Any smaller and the decorations would have been a bit oversized.
So, having made my dough, rolled it out, drawn and cut out templates and baked the gingerbread came the fun part; decorating. I'd decided that I didn't want my chimney just to be a couple of off cuts of gingerbread tacked on at the end (even before the request from a certain Esteemed Blogging Partner to be saved the chimney) so incorporated a chimney breast into one of the end walls. Subsequently, although due as much to trying to squeeze both end walls onto one baking tray, they stuck together in the oven. After separating them one became a bit lop-sided, although nothing that couldn't be disguised with large amounts of royal icing. I hadn't cut windows or a door in my wall templates, neither had I taken into account the space in the roof parts needed to slot around the chimney breast. I could, with hindsight, have claimed that this was so as to provide ample bits of baked gingerbread so I could test it was good gingerbread. But I'd be lying. But that did kick start the sugar rush which I guess must be inevitable when decorating a gingerbread house.
And yes, I made bears with the leftover bits of dough. With the help of my mum (Chief Cement Layer) and my cousin (Suggester of Other Good Ideas for Decorating) this not quite grand, but certainly endearing little edible abode took shape. Hugh's suggestion of After Eights as roof tiles had been hastily discounted (bear in mind you're going to eat the damn thing, and gingerbread and peppermint fondant sounds a weird combination) and replaced with a bag (or two, just to be safe) of Giant Chocolate Buttons, and the roof was safely covered with a whole bag to spare. I'd previously instructed my dad (retired architect) that any criticisms to do with architectural related things would result in him not being allowed any. As it was, apparently we put the tiles on the wrong way and started from the top down, rather than the bottom up. Apparently this would mean rain would get in through the tiles. Obviously if it had rained actual rain, it would have got soggy and collapsed, but then the rain that rains on gingerbread houses is probably coloured sprinkles anyway, so it doesn't matter. Chocolate Fingers made a perfectly good drainpipe, as well as guttering, doorframe, and whatever runs along the top of the roof. Other than chocolate Fingers. Mini Smarties were strung up across the front wall as fairy lights, and generous dollops of icing were dolloped on places where snow would settle.
I was a bit heavy-handed with the tablespoon measuring the syrup, and as a result the flavour was a bit too syrupy. It could also have done with a bit more ginger, but they shall be things borne in mind this year. Because there will be another one made, which, dare I say it, shall be even awesomer.
I had initially planned to make croissants for Christmas Day breakfast, but having read the recipe beforehand and seeing how stupidly long they take to make (overnight resting, several hours rising, plus shaping, cutting, folding etc) I decided on bagels instead. With a comparatively paltry single rise and prove making for about a couple of hours total, this at least meant I wouldn't have to get up at about 4am (and risk walking in on Santa coming down the chimney). Plus bagels are better than croissants anyway. Both potential croissant recipe and pervading bagel recipe came from Mr Daniel Stevens' River Cottage Bread Handbook.
Bagels
500g strong white bread flour
5g powdered dried yeast
10g fine salt
250ml warm water
20g caster sugar
50ml vegetable oil, plus extra for coating
To finish
1 medium free-range egg, beaten
Poppy or sesame seeds (optional)
In a large bowl, mix together all the ingredients to make a dough. Knead on a clean surface until smooth and elastic. Shape into a round, coat with a little extra oil and place in a clean bowl. Leave to rise, covered with a plastic bag.
When the dough has doubled in size, deflate it and divide into 12 pieces. One at a time, roll into a sausage shape, about 15cm long. Wet the ends and press them together to make a ring. Leave to prove, covered, on a lightly oiled plastic board or metal baking sheet (not floured cloths or boards).
Preheat the over to 200°C/Gas Mark 6. Lightly oil a couple of baking sheets and in a wide pan bring around a 10cm depth of water to the boil.
When the bagels have roughly doubled in size, they are ready for poaching. You will need to do this in batches. Turn the pan of water down to a simmer, then slip as many bagels as will fit comfortably into the water (allow room for them to puff up). Cook for a minute on each side, then remove and drain on a clean tea towel (not kitchen paper as it will stick).
When they are all poached, lay the bagels on the baking sheets, gently sticking any that uncurled in the water back together again. Brush all over with beaten egg, then sprinkle with seeds if you like. Bake for 15 minutes, until the bagels are a uniform, glossy golden brown. Cool on a wire rack.
So I got up early to make the dough and left it to rise whilst I then got up properly. There are no pictures of me making dough in my boxer shorts, as after all, I let the food do the talking. The dough didn't seem to be rising a huge amount, either in the initial rise or the proving stage, and I must admit to thinking 'sod it' after an hour's rising and 20 minutes proving, not least as I, and others were getting hungry, including my brother and cousin who for some mental reason had decided to run 5km on Christmas Day morning. Subsequently I was expecting rather small little bagels, until the poaching stage. I was a bit unsure as to whether 10cm of water would be sufficient, and remembered that Nigella has a recipe for bagels in How to Be A Domestic Goddess. A quick cross reference showed that Nigella suggests using a large pan, so I sided with her on that one. Sorry, Dan Stevens and all present Dan Stevens-ites. (Nigella also uses malt in the poaching water to obtain the shiny crust rather than beaten egg - time for some comparison next time I think.)
Anyway, they puffed up pretty well, almost doubling in size and then looked amazing once they came out of the oven. Flipping bagels in water is pretty satisfying, really. I'd had to make an extra trip out on Christmas Eve in search of poppy seeds for these, and a few other bits for other things (expected to take ages, hardly took any time at all as there was virtually no one out at 9am), and whilst they don't make a huge difference taste wise, I think they make them look that much more impressive. If I can make myself get up early more often at weekends then I think I will find myself making these with increasing regularity.
Next, ice cream. As I mentioned in my last post there's something about making ice cream at Christmas which meant I had to make some. I'm actually writing about these chronologically in the order I made them, I'm not sure whether that was intentional or accidental, but anyway.
On my second visit to Bocca di Lupo I'd told myself I wouldn't have anything I'd had the first time. This was all fine until the pudding stage where I was sorely tempted to go against my intentions and have the Sanguinaccio again. Eventually I held firm and instead had a brioche gelato sandwich with pistachio, hazelnut and chestnut gelati. This is almost certainly the best gelato flavour combination I've ever tasted, and despite the near deific regard in which Gelupo's pistachio ice cream is held in these parts I came away most impressed by, and most fervently remembering the chestnut. So, wanting to make some kind of festive, or at least appropriately seasonal ice cream, and recalling this I stumped for chestnut. There's no exact recipe in the Bocca book, but there are ones which can be easily adapted. I took the one for pistachio and simply replaced the pistachio paste with chestnut purée.
Chestnut Ice Cream
500ml whole milk
140ml whipping cream
40g glucose syrup or light runny honey
130g caster sugar
40g skimmed milk powder
3g leaf gelatine (1 large or 2 small leaves), or 4 teaspoons agar-agar
85g chestnut purée
45g icing sugar
For the base bianca, put the milk, cream and glucose or honey in a pan. heat over a low flame and, in a separate container, mix together the sugar and milk powder. When the pan is steaming, add the sugar mixture in a steady stream as you stir. When the mixture approaches a simmer, remove it from the heat and add either the gelatine (already bloomed for a few minutes in cold water, then stirred into the mix) or the agar-agar (sprinkled on top of the hot mixture and left for 5 minutes, then stirred in). Leave to cool, covered, to room or fridge temperature.
Blend the nut paste and icing sugar into the base bianca and freeze in an ice-cream machine as usual. For the creamiest texture let the gelato freeze as hard as it will go in the machine before taking it out.
I actually find it hard to go into much detail with this. Apart from the flavouring, this is pretty much the same ice cream recipe and procedure as my last ice cream post, only even simpler. And having the amazing ice cream machine meant I could set it going just before we sat down for Christmas Dinner and it made itself and was ready pretty much bang on time. Additionally, the tin of chestnut purée we'd harassed the Waitrose staff into finding for us had plenty more than was needed for one batch, so I made some more a couple of days later to go with a Nigel Slater cheesecake recipe I'd pulled from the Observer Food Monthly. This is without doubt the best ice cream I've ever made.
A few weeks prior to Christmas I'd seen a repeat of the previous year's River Cottage Christmas Fayre, where Gill and some others enter a gingerbread house making competition. For seemingly no other reason than 'that sounds cool', I there and then decided that I too would make a gingerbread house. So...
On Boxing Day we usually have tea followed by numerous sweet things of the cake and biscuity variety in the evening, so that seemed the ideal time to make it. As it was, with Christmas cake and what not, the house was left until the day after, only a small amount in part to not wanting to demolish it straight away. I'd hunted down that episode on 4od and watched that section a couple of times - the recipe is incredibly straight forward, so really the only thing to really think much about is one, how big to make it, and two, what to decorate it with. As a beginner in Gingerbread Masonry, I decided not to get too carried away and stuck to a four-walled, box-shaped house. Looking around, some people make some quite frankly ridiculous things out of gingerbread, and after all, you never want the aesthetical aspect of the thing to get in the way of the 'mmmmm, gingerbread' aspect.
For your bricks you will need;
1kg flour
300g muscavado sugar
10 tbsp golden syrup
1 tsp treacle
400g butter
2 tsp ground ginger
2 tsp bicarbonate of soda
And for your mortar you will need;
2 free range egg whites
400g icing sugar
Plus various sugary things to decorate
Preheat the oven to 180°C. Melt the butter, sugar, syrup and treacle together. Once combined, pour into the flour, ginger and bicarbonate of soda and mix until a dough is formed. Roll out the dough on a piece of baking parchment until about 5mm thick. Draw out templates for the walls and roof and use them to cut out the dough. Bake for 15 minutes, then leave to cool and harden.
For the royal icing/cement, whisk the egg whites until frothy, then add 300g icing sugar and whisk until thick and glossy. Add the remaining icing sugar and beat until soft peaks are formed. Add more icing sugar if required.
Watching that part of the program over again before making it the house they made looked much bigger than what I needed, so in the end I made three quarters of the amount and it came out pretty much the perfect size. Any smaller and the decorations would have been a bit oversized.
So, having made my dough, rolled it out, drawn and cut out templates and baked the gingerbread came the fun part; decorating. I'd decided that I didn't want my chimney just to be a couple of off cuts of gingerbread tacked on at the end (even before the request from a certain Esteemed Blogging Partner to be saved the chimney) so incorporated a chimney breast into one of the end walls. Subsequently, although due as much to trying to squeeze both end walls onto one baking tray, they stuck together in the oven. After separating them one became a bit lop-sided, although nothing that couldn't be disguised with large amounts of royal icing. I hadn't cut windows or a door in my wall templates, neither had I taken into account the space in the roof parts needed to slot around the chimney breast. I could, with hindsight, have claimed that this was so as to provide ample bits of baked gingerbread so I could test it was good gingerbread. But I'd be lying. But that did kick start the sugar rush which I guess must be inevitable when decorating a gingerbread house.
And yes, I made bears with the leftover bits of dough. With the help of my mum (Chief Cement Layer) and my cousin (Suggester of Other Good Ideas for Decorating) this not quite grand, but certainly endearing little edible abode took shape. Hugh's suggestion of After Eights as roof tiles had been hastily discounted (bear in mind you're going to eat the damn thing, and gingerbread and peppermint fondant sounds a weird combination) and replaced with a bag (or two, just to be safe) of Giant Chocolate Buttons, and the roof was safely covered with a whole bag to spare. I'd previously instructed my dad (retired architect) that any criticisms to do with architectural related things would result in him not being allowed any. As it was, apparently we put the tiles on the wrong way and started from the top down, rather than the bottom up. Apparently this would mean rain would get in through the tiles. Obviously if it had rained actual rain, it would have got soggy and collapsed, but then the rain that rains on gingerbread houses is probably coloured sprinkles anyway, so it doesn't matter. Chocolate Fingers made a perfectly good drainpipe, as well as guttering, doorframe, and whatever runs along the top of the roof. Other than chocolate Fingers. Mini Smarties were strung up across the front wall as fairy lights, and generous dollops of icing were dolloped on places where snow would settle.
I was a bit heavy-handed with the tablespoon measuring the syrup, and as a result the flavour was a bit too syrupy. It could also have done with a bit more ginger, but they shall be things borne in mind this year. Because there will be another one made, which, dare I say it, shall be even awesomer.
27/10/2011
Something about inevitability
Back in February I wrote on these pages that "I think I'm on a hiding to nothing trying to make really smooth ice cream at home without an ice cream machine" having just produced some incredibly tasty, but unfortunately icy thyme ice cream. So, having given away what's going on in this post straight away, a bit of back story.
Having totally missed out on the opportunity in summer, it gradually crept up on me that I really wanted an ice cream machine. I seemed to have been around numerous kitchen shops and kitchen sections of John Lewis and Bentalls and thought 'oh, I'll just have a look at the ice cream machines out of curiosity' and so the thought must have begun to ingrain itself on my subconscious. Probably that and more visits to Soho ice cream mecca, Gelupo. Also, I recently had a birthday. One of those where you fleetingly notice it a month or so in advance, then remember it again the week before when people are asking you what you want for it, and are you doing anything for it, but you don't have a clue. The sort where you end up with money to spend and think 'well, now (mid October) is the time to buy an ice cream machine'. So I did.
The other part of the back story relates to the incredibly important decision of what flavour to make first. I don't think it's quite time yet to tackle the Holy Grail of ice creams, pistachio. But I virtually had my mind made up for me the other weekend when I and Esteemed Blogging Partner Kirsty stumbled into Gelupo after an evening's drinking. Wandering round the deli whilst other people bought ice cream, I started grabbing things - some of their guanciale (the piece I cured wasn't nearly enough), some nduja, as well as some pretty incredible nougat and some honeycomb, you know, the sorts of things you don't really need, but if you buy enough results in spending enough to get free ice cream. Which we were already intending on buying. Anyway, I had almond gelato, which I later realised, wondering what to do with the honeycomb whilst eating slabs of honey almond nougat, was what I should make. One of those Things Falling Into Place things that I which happened more often so I could blog about them.
For my previous ice cream making I took one of the recipes from The French Laundry Cookbook, which as I seem to remember used a HELL of a lot of egg yolks. Regular readers of this blog will be well aware of my torment of wanting to cook things which use lots of egg yolks, leaving lots of whites left. There is actually a recipe in Bocca for some amazing pistachio and hazelnut biscuits which use lots of egg whites, but it matters not as there was only one place I was going to look for a recipe this time, and Kenedy's ice cream recipes don't use any eggs at all.
500ml whole milk, plus a little extra
200g blanched almonds, roasted very dark (not burned)
140ml whipping cream
40g glucose syrup or light runny honey
130g caster sugar
40g skimmed milk powder
3g leaf gelatine (1 large or 2 small leaves), or 4 teaspoons agar-agar
½ teaspoon almond extract
Put the milk and almonds in a pan. Heat to 80°C, just before a simmer, and steep at this temperature for 45 minutes. Strain out the almonds, put the milk in a measuring jug and make it back up to 500ml with a little extra milk (the almonds will have absorbed some moisture as they infused).
Return the milk to the pan, adding the cream and glucose or honey. Heat over a low flame and, when steaming, mix together the sugar and skimmed milk powder and add them in a steady stream. When the liquid approaches a simmer, remove it from the heat and add either the gelatine (already bloomed for a few minutes in cold water, then stirred into the mix) or the agar-agar (sprinkled on the top of the hot mixture and left for 5 minutes, then stirred in) and the almond extract. Leave to cool and freeze in an ice-cream machine.
The machine I bought has a built in freezer, so there is no requirement for freezing bowls or anything beforehand, which I guess saves a fair bit of time. The instruction manual says give it 35-45 minutes for soft ice cream, 45-60 for hard ice cream. I wanted it soft, so I gave it 45 minutes, and drizzled some of the Gelupo honey into it in the last 5 minutes. Firstly, the flavour of it is pretty damn good. When I was adding the almond extract a bit more than the half teaspoon dribbled down the side of the bottle and in, so the flavour is slightly more of that than the infused roasted almonds - there's an almost a marzipan like sweetness to it, although the extra sweetness is partly down to adding the honey. Also, the agar flakes hadn't completely dissolved, and so the consistency isn't as delightfully smooth as I'd have liked, but they're small foibles that can be sorted out come the next batch. All in all, from start to finish the whole thing took about 2 and a half hours, and that's taking into account toasting the almonds, 45 minutes of infusing in milk, mixture cooling, and then 45 minutes of freezing/churning time. And once it's in the machine, it could just be left whilst I sat and watched the football. Apparently if the mixture gets too thick before your set time expires it stops itself, clever machine. It's not exactly quiet, but hardly the Destroyer of Peace and Quiet some of the Amazon reviewers made it out to be.
Having said I missed out on summer ice cream making (not that it should ever be a summer only past-time), I've always felt winter was a good time for making ice cream. I think that may stem from the first time I ever made ice cream at Christmas one year, and so in a way this may well have been the most appropriate time of year for it. Added to which I'm harbouring intentions at the moment to make more salami for Christmas, and there's plenty of old ice cream tubs lying around. Given how long that first lot lasted, I may well find myself making ice cream at every given opportunity.
Having totally missed out on the opportunity in summer, it gradually crept up on me that I really wanted an ice cream machine. I seemed to have been around numerous kitchen shops and kitchen sections of John Lewis and Bentalls and thought 'oh, I'll just have a look at the ice cream machines out of curiosity' and so the thought must have begun to ingrain itself on my subconscious. Probably that and more visits to Soho ice cream mecca, Gelupo. Also, I recently had a birthday. One of those where you fleetingly notice it a month or so in advance, then remember it again the week before when people are asking you what you want for it, and are you doing anything for it, but you don't have a clue. The sort where you end up with money to spend and think 'well, now (mid October) is the time to buy an ice cream machine'. So I did.
The other part of the back story relates to the incredibly important decision of what flavour to make first. I don't think it's quite time yet to tackle the Holy Grail of ice creams, pistachio. But I virtually had my mind made up for me the other weekend when I and Esteemed Blogging Partner Kirsty stumbled into Gelupo after an evening's drinking. Wandering round the deli whilst other people bought ice cream, I started grabbing things - some of their guanciale (the piece I cured wasn't nearly enough), some nduja, as well as some pretty incredible nougat and some honeycomb, you know, the sorts of things you don't really need, but if you buy enough results in spending enough to get free ice cream. Which we were already intending on buying. Anyway, I had almond gelato, which I later realised, wondering what to do with the honeycomb whilst eating slabs of honey almond nougat, was what I should make. One of those Things Falling Into Place things that I which happened more often so I could blog about them.
For my previous ice cream making I took one of the recipes from The French Laundry Cookbook, which as I seem to remember used a HELL of a lot of egg yolks. Regular readers of this blog will be well aware of my torment of wanting to cook things which use lots of egg yolks, leaving lots of whites left. There is actually a recipe in Bocca for some amazing pistachio and hazelnut biscuits which use lots of egg whites, but it matters not as there was only one place I was going to look for a recipe this time, and Kenedy's ice cream recipes don't use any eggs at all.
500ml whole milk, plus a little extra
200g blanched almonds, roasted very dark (not burned)
140ml whipping cream
40g glucose syrup or light runny honey
130g caster sugar
40g skimmed milk powder
3g leaf gelatine (1 large or 2 small leaves), or 4 teaspoons agar-agar
½ teaspoon almond extract
Put the milk and almonds in a pan. Heat to 80°C, just before a simmer, and steep at this temperature for 45 minutes. Strain out the almonds, put the milk in a measuring jug and make it back up to 500ml with a little extra milk (the almonds will have absorbed some moisture as they infused).
Return the milk to the pan, adding the cream and glucose or honey. Heat over a low flame and, when steaming, mix together the sugar and skimmed milk powder and add them in a steady stream. When the liquid approaches a simmer, remove it from the heat and add either the gelatine (already bloomed for a few minutes in cold water, then stirred into the mix) or the agar-agar (sprinkled on the top of the hot mixture and left for 5 minutes, then stirred in) and the almond extract. Leave to cool and freeze in an ice-cream machine.
The machine I bought has a built in freezer, so there is no requirement for freezing bowls or anything beforehand, which I guess saves a fair bit of time. The instruction manual says give it 35-45 minutes for soft ice cream, 45-60 for hard ice cream. I wanted it soft, so I gave it 45 minutes, and drizzled some of the Gelupo honey into it in the last 5 minutes. Firstly, the flavour of it is pretty damn good. When I was adding the almond extract a bit more than the half teaspoon dribbled down the side of the bottle and in, so the flavour is slightly more of that than the infused roasted almonds - there's an almost a marzipan like sweetness to it, although the extra sweetness is partly down to adding the honey. Also, the agar flakes hadn't completely dissolved, and so the consistency isn't as delightfully smooth as I'd have liked, but they're small foibles that can be sorted out come the next batch. All in all, from start to finish the whole thing took about 2 and a half hours, and that's taking into account toasting the almonds, 45 minutes of infusing in milk, mixture cooling, and then 45 minutes of freezing/churning time. And once it's in the machine, it could just be left whilst I sat and watched the football. Apparently if the mixture gets too thick before your set time expires it stops itself, clever machine. It's not exactly quiet, but hardly the Destroyer of Peace and Quiet some of the Amazon reviewers made it out to be.
Having said I missed out on summer ice cream making (not that it should ever be a summer only past-time), I've always felt winter was a good time for making ice cream. I think that may stem from the first time I ever made ice cream at Christmas one year, and so in a way this may well have been the most appropriate time of year for it. Added to which I'm harbouring intentions at the moment to make more salami for Christmas, and there's plenty of old ice cream tubs lying around. Given how long that first lot lasted, I may well find myself making ice cream at every given opportunity.
24/10/2011
(More) About (pig) face
This post has been delayed more than any other, and it'll be a bit brief as a result, but here we go anyway. So my last post was all about curing pig's cheek, guanciale. This is the 'what does one do with it now?' Part Two to that post.
The cheek I had actually had a seemingly higher meat to fat ratio that you'd probably expect to get, although it was still over 50% fat. Which is a good thing. It was firm but not hard, and upon slicing you could see the fat glisten and shine, surrounding the layer of meat running through the middle. Frying turns it almost completely translucent for a while before browning and crisping up, whilst remaining soft inside where the fat will burst out when eaten. And the flavour is richer and more intense than say, a cured pork belly, almost headily.
As I mentioned in the curing post, I discovered guanciale in Jacob Kenedy's The Geometry of Pasta in a recipe for Bucatini Carbonara. I rarely make carbonara, it's the sort of dish where all the ingredients really have to be good quality, and subsequently if they aren't it can be not much cop. There's not much room for alchemy where mixing crap eggs and grated crap cheese is concerned. Besides, there's usually other things I'm more keen on making. Anyway, in this instance the meat was home cured, the cheese was an excellent slab of pecorino which wasn't too over powering, the pasta homemade. The eggs used for the sauce were the same deep-coloured yolk variety I always use for pasta, which gave an even more intense colour to the final dish. But I was always planning on making this with my guanciale - things like pancetta are often used to bulk up flavour in dishes, rather than stand out themselves. Having spent the best part of two months curing there was no way I was just going to hide it away in something else. Especially as what I did cure wasn't actually that much. You'll find all manner of carbonara recipes everywhere, far too many of which will say to use cream. This one is as basic as it needs to be.
1 guanciale
1 quantity fresh spaghetti (same recipe as always)
2 whole, large free range eggs
2 large free range egg yolks
100g pecorino, grated (from a block, not pre-grated)
lots of ground black pepper
1 tbsp olive oil
Make the pasta in advance and set aside. Set a large pan of well salted water boiling (around 4 litres per 250g of pasta). If you're using fresh pasta it will take literally no more than two minutes to cook, dried will take around ten minutes or so, so if you're using dried, get that on first.
Whisk together the eggs and yolks with the grated pecorino and more than enough ground black pepper. If you think you've added enough pepper, add some more. If it looks a bit too thick, loosen it with a tablespoonful or so of the pasta water.
Heat the oil in a frying pan. Slice the guanciale into sticks, about 5mm thick. Add to the pan and fry until browned. Take off the heat.
Drain the pasta and add to the guanciale pan, tossing to coat it in the pork fat. Add the eggs and cheese mixture and stir it in quickly to fully coat the pasta but without cooking the eggs. Serve with more grated pecorino and more black pepper.
I didn't make quite enough cheese and egg mixture to sufficiently coat all the pasta - it was all coated, just that some were more like they'd been brushed with it, rather than thickly covered. But the pasta was very good, as it needs to be. If I was being anal (which, to be fair isn't something rarely leveled at me) I think it would be much better with rounded spaghetti, rather than the sort of squared-off sort that my (and I suspect most) pasta machine attachments make. Minor details. It tasted damn good.
The cheek I had actually had a seemingly higher meat to fat ratio that you'd probably expect to get, although it was still over 50% fat. Which is a good thing. It was firm but not hard, and upon slicing you could see the fat glisten and shine, surrounding the layer of meat running through the middle. Frying turns it almost completely translucent for a while before browning and crisping up, whilst remaining soft inside where the fat will burst out when eaten. And the flavour is richer and more intense than say, a cured pork belly, almost headily.
As I mentioned in the curing post, I discovered guanciale in Jacob Kenedy's The Geometry of Pasta in a recipe for Bucatini Carbonara. I rarely make carbonara, it's the sort of dish where all the ingredients really have to be good quality, and subsequently if they aren't it can be not much cop. There's not much room for alchemy where mixing crap eggs and grated crap cheese is concerned. Besides, there's usually other things I'm more keen on making. Anyway, in this instance the meat was home cured, the cheese was an excellent slab of pecorino which wasn't too over powering, the pasta homemade. The eggs used for the sauce were the same deep-coloured yolk variety I always use for pasta, which gave an even more intense colour to the final dish. But I was always planning on making this with my guanciale - things like pancetta are often used to bulk up flavour in dishes, rather than stand out themselves. Having spent the best part of two months curing there was no way I was just going to hide it away in something else. Especially as what I did cure wasn't actually that much. You'll find all manner of carbonara recipes everywhere, far too many of which will say to use cream. This one is as basic as it needs to be.
1 guanciale
1 quantity fresh spaghetti (same recipe as always)
2 whole, large free range eggs
2 large free range egg yolks
100g pecorino, grated (from a block, not pre-grated)
lots of ground black pepper
1 tbsp olive oil
Make the pasta in advance and set aside. Set a large pan of well salted water boiling (around 4 litres per 250g of pasta). If you're using fresh pasta it will take literally no more than two minutes to cook, dried will take around ten minutes or so, so if you're using dried, get that on first.
Whisk together the eggs and yolks with the grated pecorino and more than enough ground black pepper. If you think you've added enough pepper, add some more. If it looks a bit too thick, loosen it with a tablespoonful or so of the pasta water.
Heat the oil in a frying pan. Slice the guanciale into sticks, about 5mm thick. Add to the pan and fry until browned. Take off the heat.
Drain the pasta and add to the guanciale pan, tossing to coat it in the pork fat. Add the eggs and cheese mixture and stir it in quickly to fully coat the pasta but without cooking the eggs. Serve with more grated pecorino and more black pepper.
I didn't make quite enough cheese and egg mixture to sufficiently coat all the pasta - it was all coated, just that some were more like they'd been brushed with it, rather than thickly covered. But the pasta was very good, as it needs to be. If I was being anal (which, to be fair isn't something rarely leveled at me) I think it would be much better with rounded spaghetti, rather than the sort of squared-off sort that my (and I suspect most) pasta machine attachments make. Minor details. It tasted damn good.
26/09/2011
This Is My Jam
Wow, it feels like forever since I've been active on this blog. At the moment I'm at one of those pivotal, lifechanging moments in my life, and I think today is the first day I've really had any time to sit down and appreciate the marvellous chaos I'm currently a part of. I'm not too certain on details yet, but regardless of what is happening, this small-town barmaid is a small-town barmaid no more. Things are getting really exciting, and I feel like over the past week I've visited almost all of the south of the country. Still, for the moment I'm back home, and tending my little garden, in which the ripe and unripe tomatoes look like little traffic light dots, and the runner beans are trying to climb the washing line; and I'm feeling good.
I haven't been cooking so much recently, but before this frenzy there came a rut, in which all I did was huddle over the stove, swearing to myself and stirring a la the opening witchy scenes of Macbeth. It wasn't a predicting the future kind of thing, mind, it was a mechanism via which to stay sane in the present. I even got myself back into preserving. Now, since this is what I'll call backlog blogging, I can't say you'll find the ingredients with any relative ease at this time of year; but this is as much a diary for me as a suggestion to my readers, so I'll call this a kind of posterity post.
In keeping with my last post about raspberry and elderflower cupcakes, in early September I was still finding a whole bunch of excellent Summer produce, in glut-sized proportion, for silly money. Again, today, we're talking berries, but this time, the perennial English favourite, the strawberry. Now, wimbledon is over, so I had no problem eating a whole bunch of them with cream, because I wasn't being told to by advertisers everywhere; but I did buy 2kg of the things (they were so cute...I had to), so I needed a more sensible solution to what to do with them.
I decided on the most English of preserves: Strawberry jam. It makes you think of red and white gingham and scones just saying it, huh? I'm not really a gingham kind of girl, but I might fancy playing at being one on any given day, so a few jars of homemade strawberry jam in the cupboard for when the mood strikes me seems like a good idea. Although I'm sure you'll believe me more if I say I've mostly been piling it on toast to accompany a black coffee or seven of a morning.
So anyway, who do you turn to in the case of preserves? Who else but my jarring, bottling, and infusing guru, Pam Corbin? No one else. Obviously. I have nothing but love for her simple, friendly approach to preserving, and sort of want her to adopt me so I can go live with her and preserve all day and sew cool aprons for us to wear all night. So, without further ado, here is my very picture heavy approach to strawberry jam, taken from her River Cottage Preserves Handbook:
Strawberry Jam
makes 4-5 340g jars
1kg strawberries, hulled, larger ones halved or quartered
500g granulated sugar
450g jam sugar (it's labelled as such and has added pectin which helps the set)
150ml lemon juice
Put 200g of the strawberries into a preserving pan with 200g of the granulated sugar. Crush to a pulp with a potato masher. At which point it will look like this:

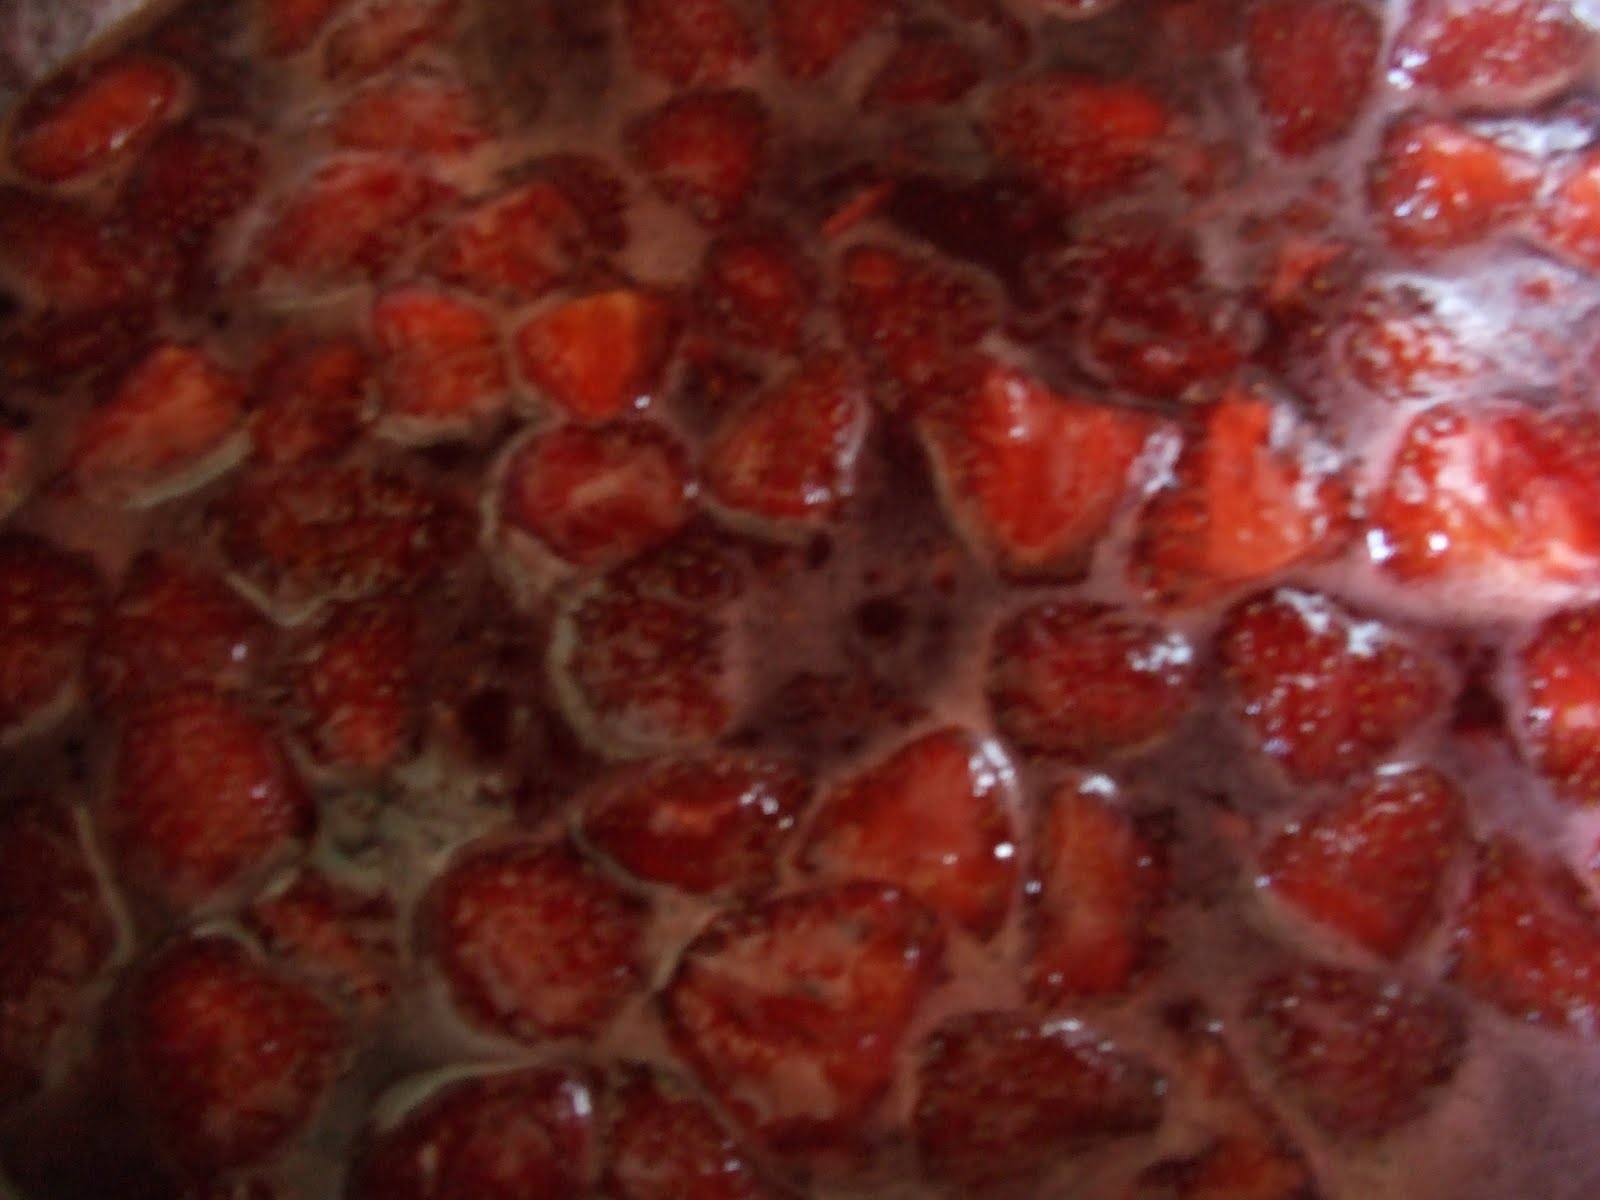
Place the pan on a gentle heat and, when the fruit mixture is warm, add the rest of the strawberries. Very gently bring to a simmering point, agitating the bottom of the pan with a wooden spoon to prevent the fruit from sticking. Simmer for 5 minutes to allow the strawberries to soften just a little. At which point it will look like this:

Add the remaining granulated sugar and the jam sugar. Stir gently to prevent the sugar sticking and burning on the bottom of the pan. When the sugar has dissolved, add the lemon juice. It'll look a bit like this:

Increase the heat and, when the mixture reaches a full boil, boil rapidly for 8-9 minutes. Then test for setting point. (I do this by dropping some onto a cold saucer and poking it with a finger to see if it puckers; if it puckers it's ready). Mine looked like this at setting point:

Remove from the heat and, if the surface is scummy, stir gently to disperse. Pot and seal. Use within 12 months.
So that's strawberry jam. i forgot to take4 pictures of the potted and sealed jam because I am something of an airhead, but you get the idea. I only got two jars, because one of them was disproportionately large (previously containing mayonnaise. Whoever tells you you can't recycle jars for preserving is probaboly in the glass industry, because I'm telling you now that you can, and you should if you give two fucks about the environment)
My jam was really nice; I have been eating it on toast for breakfast every morning I've woken up in my own bed (and there are pluses and minuses to this scenario: the strawberry jam on toast being one of the pluses). I am not really a strawberry jam aficionado; since when I was little, which seems to be the halcyon jam eating days in most people's lives, my heart belonged solely to apricot, but this is definitely better than the shop-bought stuff by a mile. The only problem with my jam was that the fruit seemed to float to the top of the jars, which according to Pam means I didn't take quite enough care dissolving the sugar before bringing the mixture to the slightly scary high-speed boil it needs before it becomes jam. It would seem I still have a way to go before I can be her preserving/apron-making apprentice extraordinaire, but in the meantime I have the wherewithal, should i want to, to make scones and victoria sponges all winter long. And who doesn't want to do that?
I haven't been cooking so much recently, but before this frenzy there came a rut, in which all I did was huddle over the stove, swearing to myself and stirring a la the opening witchy scenes of Macbeth. It wasn't a predicting the future kind of thing, mind, it was a mechanism via which to stay sane in the present. I even got myself back into preserving. Now, since this is what I'll call backlog blogging, I can't say you'll find the ingredients with any relative ease at this time of year; but this is as much a diary for me as a suggestion to my readers, so I'll call this a kind of posterity post.
In keeping with my last post about raspberry and elderflower cupcakes, in early September I was still finding a whole bunch of excellent Summer produce, in glut-sized proportion, for silly money. Again, today, we're talking berries, but this time, the perennial English favourite, the strawberry. Now, wimbledon is over, so I had no problem eating a whole bunch of them with cream, because I wasn't being told to by advertisers everywhere; but I did buy 2kg of the things (they were so cute...I had to), so I needed a more sensible solution to what to do with them.
I decided on the most English of preserves: Strawberry jam. It makes you think of red and white gingham and scones just saying it, huh? I'm not really a gingham kind of girl, but I might fancy playing at being one on any given day, so a few jars of homemade strawberry jam in the cupboard for when the mood strikes me seems like a good idea. Although I'm sure you'll believe me more if I say I've mostly been piling it on toast to accompany a black coffee or seven of a morning.
So anyway, who do you turn to in the case of preserves? Who else but my jarring, bottling, and infusing guru, Pam Corbin? No one else. Obviously. I have nothing but love for her simple, friendly approach to preserving, and sort of want her to adopt me so I can go live with her and preserve all day and sew cool aprons for us to wear all night. So, without further ado, here is my very picture heavy approach to strawberry jam, taken from her River Cottage Preserves Handbook:
Strawberry Jam
makes 4-5 340g jars
1kg strawberries, hulled, larger ones halved or quartered
500g granulated sugar
450g jam sugar (it's labelled as such and has added pectin which helps the set)
150ml lemon juice
Put 200g of the strawberries into a preserving pan with 200g of the granulated sugar. Crush to a pulp with a potato masher. At which point it will look like this:
Place the pan on a gentle heat and, when the fruit mixture is warm, add the rest of the strawberries. Very gently bring to a simmering point, agitating the bottom of the pan with a wooden spoon to prevent the fruit from sticking. Simmer for 5 minutes to allow the strawberries to soften just a little. At which point it will look like this:
Add the remaining granulated sugar and the jam sugar. Stir gently to prevent the sugar sticking and burning on the bottom of the pan. When the sugar has dissolved, add the lemon juice. It'll look a bit like this:
Increase the heat and, when the mixture reaches a full boil, boil rapidly for 8-9 minutes. Then test for setting point. (I do this by dropping some onto a cold saucer and poking it with a finger to see if it puckers; if it puckers it's ready). Mine looked like this at setting point:
Remove from the heat and, if the surface is scummy, stir gently to disperse. Pot and seal. Use within 12 months.
So that's strawberry jam. i forgot to take4 pictures of the potted and sealed jam because I am something of an airhead, but you get the idea. I only got two jars, because one of them was disproportionately large (previously containing mayonnaise. Whoever tells you you can't recycle jars for preserving is probaboly in the glass industry, because I'm telling you now that you can, and you should if you give two fucks about the environment)
My jam was really nice; I have been eating it on toast for breakfast every morning I've woken up in my own bed (and there are pluses and minuses to this scenario: the strawberry jam on toast being one of the pluses). I am not really a strawberry jam aficionado; since when I was little, which seems to be the halcyon jam eating days in most people's lives, my heart belonged solely to apricot, but this is definitely better than the shop-bought stuff by a mile. The only problem with my jam was that the fruit seemed to float to the top of the jars, which according to Pam means I didn't take quite enough care dissolving the sugar before bringing the mixture to the slightly scary high-speed boil it needs before it becomes jam. It would seem I still have a way to go before I can be her preserving/apron-making apprentice extraordinaire, but in the meantime I have the wherewithal, should i want to, to make scones and victoria sponges all winter long. And who doesn't want to do that?
Labels:
jam,
kirsty,
preserving,
strawberries,
vegan,
vegetarian
08/09/2011
I'm Somewhere Inbetween
So you know how I made all that fuss at the beginning of summer about how I was going to miss slow cooking and afternoons in the kitchen and big bold winter dishes? Well, summer is drawing to a close and I'm finding myself not quite ready to give up on delicate, barely-cooked food picked straight from the garden. I find there's just no pleasing some people. More often than not, I find I'm one of them. I come most alive during periods of transition; when there's the promise of new challenges and scenarios but the old ones are still, comfortingly, in play. I don't so much like change, as the possibility of it; I've always been obsessed with potential. I guess that's why I'm currently happier in my kitchen than anywhere else. The hedgerows are starting to come alive, and I'm picking damsons and blackberries almost everywhere I walk in the villages, but I've still got tomatoes and courgettes and beans ripening in the garden. Autumn is coming but it's very easy to keep Summer alive.
The shops, at the moment, seem to be aiding and abetting my pleasure in indecision. The erratic Summer we've had seems to be affecting not just my garden, but the country as a whole. Some of the best 'summer' produce I've bought has been in the last week or so: late varieties of every type of berry and currant you could conceivably imagine; stunning courgettes and beans; all cheap, plentiful, and wonderful. So i can't help it if my mind is somewhere in July, can I? My surroundings are conspiring to help me.
Now, most of the aforementioned berries and currants were eaten raw, or made into simple compotes and eaten over yoghurt at what I, the nocturnal barmaid, have the gall to call breakfast time. But when you're buying perishables in glut-size lots, you have to vary up how you eat them pretty quickly or you're going to end up wasting them, or getting bored shitless with them, or both. So, when faced with the third perfect little punnet of raspberries after days and days of raw raspberries and yoghurt, I knew I had to make them into something that I would, and more importantly, a lot of other people would help, eat. And quickly.
Now I'm not sure about anyone else round here, but when it's a question of food and mass appeal, the answer, to my mind, is pretty much always cake. Everyone likes cake. Well, this is not strictly true, but everyone I've ever met who has professed to not like cake has been so wilfully miserable and stubborn that I've not kept them around very long. So, to put it another way; all of my friends like cake. If I make it, they will eat it. So I grabbed my punnet of raspberries and got myself flicking through Harry Eastwood's Red Velvet and Chocolate Heartache, and found the perfect 'I'm not letting go of Summer and you can't make me' recipe:
Raspberry and Elderflower Cupcakes
2 medium free-range eggs
140g caster sugar
200g topped, tailed, peeled, and finely grated courgette
3 tbsp elderflower cordial (sadly, not home made as I missed the elderflowers this year, but I had this knocking around from making pitchers of lovely Plymouth Lemonade to get drunk on)
80g white rice flour (I used plain, you're allowed to substitute it)
120g ground almonds
2 tsp baking powder
1/4 tsp salt (I omitted this; I don't often salt cakes unless they're chocolate)
120g fresh raspberries plus 12 extra ones for the tops
For the icing:
140g icing sugar
3 tbsp elderflower cordial
Preheat the oven to 180 degrees c/gas mark 4 and line a muffin tray with paper cases (note, I found this recipe created 18 cakes, so I lined an extra six hole tray).
Whisk the eggs and sugar in a large mixing bowl for 5 minutes, until pale and quadrupled in volume.
Add the grated courgette and the elderflower cordial, and whisk again. Mix in the flour, ground almonds, baking powder and salt until they are well introduced. Gently fold in the raspberries, taking care not to crush them up too much.
Spoon the mixture into cupcake cases, and place in the oven for 25 minutes until risen and cooked. Don't be alarmed that they are flat on the top rather than dome shaped. This is perfectly normal.
Cool the cupcakes for 15 minutes while you make the icing. Sieve the icing sugar into a small mixing bowl. Add the elderflower cordial and mix until it forms a loose white icing. Add colouring if you want to use it.
Ice each cake individually and top with a raspberry.
And here are mine:

Cute little things, aren't they? I have to admit that even as a 23 year old girl I still get just a tiny bit delighted when things I make look like illustrations from children's books. It reminds me of the time when in Brownies I had to host a tea party to get my hostess badge (you're damn right I've got a badge in hostessing; I got one at Guides too), so I went through a load of kid's books, being a kid at the time, along with my mum's Beginner's cookbook from the seventies, in order to work out what a tea party looked like and involved. I remember being very impressed when the cakes I'd made looked like the ones in a picture from a book about kittens having tea. I dare say these little things wouldn't have looked out of place on the kittens' pastel tea party table, either, so I am just as pleased with myself this time.
Still, a busy girl like me uses her hostess badge skills behind a bar these days, so I don't have time for tea parties. Instead I took a whole bunch of the cakes to work to give to my coworkers, who received them with pleasure. they were marvellous tasting little things, and i enjoyed the cook's share of them before work (and after work), with a pot of rose infused tea. But I didn't go so far as trying to share it with my cats. Village life hasn't got to me that badly yet.
The shops, at the moment, seem to be aiding and abetting my pleasure in indecision. The erratic Summer we've had seems to be affecting not just my garden, but the country as a whole. Some of the best 'summer' produce I've bought has been in the last week or so: late varieties of every type of berry and currant you could conceivably imagine; stunning courgettes and beans; all cheap, plentiful, and wonderful. So i can't help it if my mind is somewhere in July, can I? My surroundings are conspiring to help me.
Now, most of the aforementioned berries and currants were eaten raw, or made into simple compotes and eaten over yoghurt at what I, the nocturnal barmaid, have the gall to call breakfast time. But when you're buying perishables in glut-size lots, you have to vary up how you eat them pretty quickly or you're going to end up wasting them, or getting bored shitless with them, or both. So, when faced with the third perfect little punnet of raspberries after days and days of raw raspberries and yoghurt, I knew I had to make them into something that I would, and more importantly, a lot of other people would help, eat. And quickly.
Now I'm not sure about anyone else round here, but when it's a question of food and mass appeal, the answer, to my mind, is pretty much always cake. Everyone likes cake. Well, this is not strictly true, but everyone I've ever met who has professed to not like cake has been so wilfully miserable and stubborn that I've not kept them around very long. So, to put it another way; all of my friends like cake. If I make it, they will eat it. So I grabbed my punnet of raspberries and got myself flicking through Harry Eastwood's Red Velvet and Chocolate Heartache, and found the perfect 'I'm not letting go of Summer and you can't make me' recipe:
Raspberry and Elderflower Cupcakes
2 medium free-range eggs
140g caster sugar
200g topped, tailed, peeled, and finely grated courgette
3 tbsp elderflower cordial (sadly, not home made as I missed the elderflowers this year, but I had this knocking around from making pitchers of lovely Plymouth Lemonade to get drunk on)
80g white rice flour (I used plain, you're allowed to substitute it)
120g ground almonds
2 tsp baking powder
1/4 tsp salt (I omitted this; I don't often salt cakes unless they're chocolate)
120g fresh raspberries plus 12 extra ones for the tops
For the icing:
140g icing sugar
3 tbsp elderflower cordial
Preheat the oven to 180 degrees c/gas mark 4 and line a muffin tray with paper cases (note, I found this recipe created 18 cakes, so I lined an extra six hole tray).
Whisk the eggs and sugar in a large mixing bowl for 5 minutes, until pale and quadrupled in volume.
Add the grated courgette and the elderflower cordial, and whisk again. Mix in the flour, ground almonds, baking powder and salt until they are well introduced. Gently fold in the raspberries, taking care not to crush them up too much.
Spoon the mixture into cupcake cases, and place in the oven for 25 minutes until risen and cooked. Don't be alarmed that they are flat on the top rather than dome shaped. This is perfectly normal.
Cool the cupcakes for 15 minutes while you make the icing. Sieve the icing sugar into a small mixing bowl. Add the elderflower cordial and mix until it forms a loose white icing. Add colouring if you want to use it.
Ice each cake individually and top with a raspberry.
And here are mine:
Cute little things, aren't they? I have to admit that even as a 23 year old girl I still get just a tiny bit delighted when things I make look like illustrations from children's books. It reminds me of the time when in Brownies I had to host a tea party to get my hostess badge (you're damn right I've got a badge in hostessing; I got one at Guides too), so I went through a load of kid's books, being a kid at the time, along with my mum's Beginner's cookbook from the seventies, in order to work out what a tea party looked like and involved. I remember being very impressed when the cakes I'd made looked like the ones in a picture from a book about kittens having tea. I dare say these little things wouldn't have looked out of place on the kittens' pastel tea party table, either, so I am just as pleased with myself this time.
Still, a busy girl like me uses her hostess badge skills behind a bar these days, so I don't have time for tea parties. Instead I took a whole bunch of the cakes to work to give to my coworkers, who received them with pleasure. they were marvellous tasting little things, and i enjoyed the cook's share of them before work (and after work), with a pot of rose infused tea. But I didn't go so far as trying to share it with my cats. Village life hasn't got to me that badly yet.
Labels:
baking,
cake,
cupcakes,
dairy free,
kirsty,
raspberries,
vegetarian
24/08/2011
The Centre Cannot Hold.
I haven't been doing much cooking at all lately. I could pretend it's the summer heat, that I've been busy at work, that other things have gotten in the way; but actually I've just been really down at heel and not really doing anything at all. I occasionally get into a headspace, when things get difficult and I feel directionless, where I just stop. It's like going into shutdown to preserve energy; I just about manage the essentials of living like going to work and getting dressed in the morning, but that's really about it. Which explains why you haven't heard much from me lately. I've been busy drinking gin and staring into space as a kind of complementary activity to the life-evaluating that is constantly going on in my brain at the moment.
I actually made the recipe I am going to tell you about today a week ago, maybe even two. I was given some beautiful, huge, pale green courgettes by my American friend Ed (who seems to be getting regular shoutouts in pretty much everything I write about food these days). I've been eating a lot of courgettes of late, since my garden is producing tiny, beautiful bright yellow ones every other day and pretty much every restaurant meal I've eaten has involved them in some way, so I wanted to deviate a little beyond my usual approach of grilling them and eating them with oil, salt, and lemon juice. I mean, it works superbly well, and is a brilliant minimum effort way of plot-to-plate cooking in under ten minutes, but I wanted to try using courgettes in a way that felt more substantial for a change. So, I turned, as I seem to be doing with rapidly intensifying frequency, to Ottolenghi. I know this blog is basically in danger of becoming Kirsty rhapsodizing about every single recipe in Plenty; but I wouldn't do it if the recipes weren't so good. He has a lot of courgette recipes, but I plumped for this one:
Pasta and Fried Courgette Salad
150ml sunflower oil
3 medium courgettes, cut into 5mm thick slices
1 1/2 tbsp red wine vinegar
100g frozen baby soya beans
50g basil leaves, shredded coarsely
15g parsley leaves
75ml olive oil
250g strozzapreti (which Ottolenghi oh-so-generously suggests you can sub for any short interestingly shaped pasta, handy if you're a hick from the sticks like me)
grated zest of one lemon
1 1/2 tbsp small capers
200g buffalo mozzarella, torn by hand into chunks
salt and black pepper
Heat up the sunflower oil in a medium saucepan. Fry the courgette slices in a few batches, making sure you don't crowd them, for 3 minutes, or until golden brown on both sides; turn them over once only. As they are cooked, transfer to a colander to drain. Tip the courgette slices into a bowl, pour over the vinegar and stir, then set aside.
Blanch the soya beans for 3 minutes in boiling water; drain, refresh under cold running water and set aside to dry.
Combine half the basil, all of the parsley and the olive oil in a small food processor bowl, adding a bit of salt and pepper. Blitz to a smooth sauce.
Cook the pasta in boiling salted water to the al dente stage; drain the pasta, rinse under a stream of cold water and leave to dry. Return to the pan in which it was cooked.
Pour the courgettes and their juices over the pasta. Add the soy beans, basil sauce, lemon zest, capers and mozzarella. stir gently together, then taste and season with plenty of salt and pepper. Before serving, stir in the remaining basil.
So here's mine:
As you can see it's your typical Ottolenghi colour and ingredient fest, but actually it might just be the nicest pasta salad I have ever eaten. I don't say such things lightly, since my early teens I've been something of a pasta salad fanatic, and positively fume at the horrendous crimes committed in their name by supermarkets and thoughtless cooks. I like mayonnaise as much as the next person, but I'll pass on eating a bowful of it, ta. The vinegar on the courgettes is actually a stroke of genius; it brings out their natural sweetness and lets them really sing; which is no difficult feat in a dish with strong flavours like capers and basil going on. On that note, I would suggest the the mozzarella provides a kind of respite for the palate with it's milkiness, but I wouldn't say the dish would suffer any huge loss for its omission if there was a necessity to veganize it. If my courgette harvests continue at the rate they are I think this recipe will likely become a bit of a fridge mainstay until the end of september, as it keeps pretty well.
I actually made the recipe I am going to tell you about today a week ago, maybe even two. I was given some beautiful, huge, pale green courgettes by my American friend Ed (who seems to be getting regular shoutouts in pretty much everything I write about food these days). I've been eating a lot of courgettes of late, since my garden is producing tiny, beautiful bright yellow ones every other day and pretty much every restaurant meal I've eaten has involved them in some way, so I wanted to deviate a little beyond my usual approach of grilling them and eating them with oil, salt, and lemon juice. I mean, it works superbly well, and is a brilliant minimum effort way of plot-to-plate cooking in under ten minutes, but I wanted to try using courgettes in a way that felt more substantial for a change. So, I turned, as I seem to be doing with rapidly intensifying frequency, to Ottolenghi. I know this blog is basically in danger of becoming Kirsty rhapsodizing about every single recipe in Plenty; but I wouldn't do it if the recipes weren't so good. He has a lot of courgette recipes, but I plumped for this one:
Pasta and Fried Courgette Salad
150ml sunflower oil
3 medium courgettes, cut into 5mm thick slices
1 1/2 tbsp red wine vinegar
100g frozen baby soya beans
50g basil leaves, shredded coarsely
15g parsley leaves
75ml olive oil
250g strozzapreti (which Ottolenghi oh-so-generously suggests you can sub for any short interestingly shaped pasta, handy if you're a hick from the sticks like me)
grated zest of one lemon
1 1/2 tbsp small capers
200g buffalo mozzarella, torn by hand into chunks
salt and black pepper
Heat up the sunflower oil in a medium saucepan. Fry the courgette slices in a few batches, making sure you don't crowd them, for 3 minutes, or until golden brown on both sides; turn them over once only. As they are cooked, transfer to a colander to drain. Tip the courgette slices into a bowl, pour over the vinegar and stir, then set aside.
Blanch the soya beans for 3 minutes in boiling water; drain, refresh under cold running water and set aside to dry.
Combine half the basil, all of the parsley and the olive oil in a small food processor bowl, adding a bit of salt and pepper. Blitz to a smooth sauce.
Cook the pasta in boiling salted water to the al dente stage; drain the pasta, rinse under a stream of cold water and leave to dry. Return to the pan in which it was cooked.
Pour the courgettes and their juices over the pasta. Add the soy beans, basil sauce, lemon zest, capers and mozzarella. stir gently together, then taste and season with plenty of salt and pepper. Before serving, stir in the remaining basil.
So here's mine:
As you can see it's your typical Ottolenghi colour and ingredient fest, but actually it might just be the nicest pasta salad I have ever eaten. I don't say such things lightly, since my early teens I've been something of a pasta salad fanatic, and positively fume at the horrendous crimes committed in their name by supermarkets and thoughtless cooks. I like mayonnaise as much as the next person, but I'll pass on eating a bowful of it, ta. The vinegar on the courgettes is actually a stroke of genius; it brings out their natural sweetness and lets them really sing; which is no difficult feat in a dish with strong flavours like capers and basil going on. On that note, I would suggest the the mozzarella provides a kind of respite for the palate with it's milkiness, but I wouldn't say the dish would suffer any huge loss for its omission if there was a necessity to veganize it. If my courgette harvests continue at the rate they are I think this recipe will likely become a bit of a fridge mainstay until the end of september, as it keeps pretty well.
10/08/2011
When life gives you plums...
I had an early meeting at work the other day (yes, in the licensed trade I do sometimes still have to haul my arse out of bed in the morning, but not nearly so often as you 9-5ers). As I blustered in, I bumped into Lorraine, our cleaner and kitchen porter, who asked me if I liked/wanted some plums. I said yeah, and was immediately granted a bowlful, which perched next to me while I went through paperwork and projects with my training officer:
Now, that might seem like an odd little setup for a work meeting, I guess. But it makes more sense if you consider that my passion for food, gardening, and cooking is gaining repute throughout the village I work in and the community I serve. And that Lorraine's neighbours tree was fruiting at the time, so she had a huge carrier bag of the things with her. I'm often gifted with foodstuffs to 'make something with' at work these days, and I'm always happy to take it, and bring in some of the results to share with my coworkers and friends. I like the idea of food creating community, and community creating food.
So I cycled home, to leaf through my cookbooks and find something to make with the plums. I wanted something to fit the season, not too heavy or wintery, and bizarrely, the only thing i could find that didn't resonate with sitting down in knitwear in a heated house was Nigella Lawson's Winter Plum Cake, from How to be a Domestic Goddess. She calls it a winter cake because it's made with tinned plums (something I sort of shudder to think of, sorry to say) so I figured whipping one up with fresh plums would be enough to take the Winter right out of it. and that is exactly what I did, and here is my adapted recipe:
Not-so-Wintery-Plum-Cake
for the cake:
567g tin red plums (or the unweighed amount of fresh, stoned plums i had, which must have been about the 600g mark)
125g self-raising flour
1/2 teaspoon of baking powder
75g ground almonds
125g butter, softened
125g light brown sugar
2 large eggs (keep it organic and free range, people)
1 scant teaspoon almond essence
20cm springform cake tin, buttered and lined.
for the icing:
160g unrefined icing sugar
1-2 tablespoons hot water.
preheat the oven to 170 degrees c/gas mark 3.
Chop your plums. I went for 2.5cm dice, which seemed to be fine, although if you're worried about uneven distribution, chop them as fine as you see fit. Leave aside. Mix the flour, baking powder, and ground almonds. Cream the butter and sugar, then beat in the eggs, adding a tablespoon of the flour mixture after each one. Beat in the almond essence, then fold in the rest of the flour mixture and the drained, chopped plums. Turn into the prepared tin and bake for about 1 1/4 hours, though check at 1 hour. When it's ready, coming away from the sides of the tin, take out of the oven, leave in it's tin to cool for ten minutes, then turn out onto a wire rack.
When cool, ice with brown sugar icing, which you make simply by mixing the sieved icing sugar with water til you have a caramel coloured paste. pour over the top of the cake to cover thinly, not necessarily uniformly, and leave to drip, here and there, down the sides.
So here it is:
I was quietly proud of this cake, it's by no means an elegant confection, but it has the kind of country cooking charm that's totally appropriate to how I obtained it's principal ingredient. It tasted amazing; the plums were tart and contrasted beautifully with the marzipan-like taste and texture of the sponge; i'm not sure I'd bother making this with sweetened tinned fruit having tried it in this incarnation. It was the perfect unfussy cake to serve in huge wodges with mugs of coffee (some cakes are tea cakes, and some are coffee cakes; i don't make the rules; I just obey them). I took a slab of it down to work with me to share with my coworkers; and it went down a storm. Using cake to win friends and influence people? Maybe, but whatever works.
Now, that might seem like an odd little setup for a work meeting, I guess. But it makes more sense if you consider that my passion for food, gardening, and cooking is gaining repute throughout the village I work in and the community I serve. And that Lorraine's neighbours tree was fruiting at the time, so she had a huge carrier bag of the things with her. I'm often gifted with foodstuffs to 'make something with' at work these days, and I'm always happy to take it, and bring in some of the results to share with my coworkers and friends. I like the idea of food creating community, and community creating food.
So I cycled home, to leaf through my cookbooks and find something to make with the plums. I wanted something to fit the season, not too heavy or wintery, and bizarrely, the only thing i could find that didn't resonate with sitting down in knitwear in a heated house was Nigella Lawson's Winter Plum Cake, from How to be a Domestic Goddess. She calls it a winter cake because it's made with tinned plums (something I sort of shudder to think of, sorry to say) so I figured whipping one up with fresh plums would be enough to take the Winter right out of it. and that is exactly what I did, and here is my adapted recipe:
Not-so-Wintery-Plum-Cake
for the cake:
567g tin red plums (or the unweighed amount of fresh, stoned plums i had, which must have been about the 600g mark)
125g self-raising flour
1/2 teaspoon of baking powder
75g ground almonds
125g butter, softened
125g light brown sugar
2 large eggs (keep it organic and free range, people)
1 scant teaspoon almond essence
20cm springform cake tin, buttered and lined.
for the icing:
160g unrefined icing sugar
1-2 tablespoons hot water.
preheat the oven to 170 degrees c/gas mark 3.
Chop your plums. I went for 2.5cm dice, which seemed to be fine, although if you're worried about uneven distribution, chop them as fine as you see fit. Leave aside. Mix the flour, baking powder, and ground almonds. Cream the butter and sugar, then beat in the eggs, adding a tablespoon of the flour mixture after each one. Beat in the almond essence, then fold in the rest of the flour mixture and the drained, chopped plums. Turn into the prepared tin and bake for about 1 1/4 hours, though check at 1 hour. When it's ready, coming away from the sides of the tin, take out of the oven, leave in it's tin to cool for ten minutes, then turn out onto a wire rack.
When cool, ice with brown sugar icing, which you make simply by mixing the sieved icing sugar with water til you have a caramel coloured paste. pour over the top of the cake to cover thinly, not necessarily uniformly, and leave to drip, here and there, down the sides.
So here it is:
I was quietly proud of this cake, it's by no means an elegant confection, but it has the kind of country cooking charm that's totally appropriate to how I obtained it's principal ingredient. It tasted amazing; the plums were tart and contrasted beautifully with the marzipan-like taste and texture of the sponge; i'm not sure I'd bother making this with sweetened tinned fruit having tried it in this incarnation. It was the perfect unfussy cake to serve in huge wodges with mugs of coffee (some cakes are tea cakes, and some are coffee cakes; i don't make the rules; I just obey them). I took a slab of it down to work with me to share with my coworkers; and it went down a storm. Using cake to win friends and influence people? Maybe, but whatever works.
08/08/2011
Greener Pastures
So I'm still in the throes of a non-cooking kind of cooking,. I'd make excuses, but it's oppressive here in the midlands, and I work in a polyester uniform so I am really feeling it. I have noticed since becoming vegetarian, that summer cooking is both easier and harder. You can't rely, any longer, on one centerpiece, say, a poached salmon or roast chicken, and quickly prepared, raw-or-almost-raw accompaniments to make a meal. You can, however, get dinner on the table far quicker, as vegetables tend to respond better than most meats to a preparation that is almost nil. I have been almost exclusively living on cute little yellow courgettes from my garden, grilled, fried, shaved raw into a lemon and herb dressing; chucked into pasta, quinoa or couscous. This is part laziness, part response to a glut, and part because it's really all I want to eat. I mean, I'm running around like a headless chicken behind a bar, cycling to get everywhere, and digging myself exhausted in the garden; the very last thing I need is food that weighs on me like a rock.
However, sometimes, surprisingly, I run out of courgettes. So I've been finding other, fussless recipes for something light but satisfying, and have reverted back to my student habit of big-batching bowfuls of the stuff and keeping it in the fridge for whenever I feel like grabbing a plateful. It's a kind of cooking and eating that satisfies my internal unstructured forager instincts, without me resorting to standing in front of the fridge repeatedly eating the odd bit of cheese, or olives, or whatever, and ignoring dinner (if left to my own devices long enough this is exactly the kind of behaviour I consider to be normal, and don't even act like you don't do it too).
Now that Ottolenghi and I are buds again, I've been hitting his cookbook up regularly. There are Plenty (you don't have to think I'm funny, but it helps) of recipes of his that use bunch after bunch of summer produce, to the point where I feel like I'm racing against the calendar to try as many as possible before the weather starts to turn and I find myself back in the season for funghi, winter squash, and roots. This one perfectly fits my current 'why make the kitchen hotter than it has to be?' mood, and might just be the best looking and tasting couscous I have ever eaten:
Green Couscous
150g couscous
160ml boiling water or vegetable stock
1 small onion, thinly sliced
1 tbsp olive oil
1/4 tsp salt
1/4 tsp ground cumin
50g shelled unsalted pistachios, toasted and roughly chopped
3 spring onions, finely sliced
30g rocket, chopped
Herb Paste
20g parsley
20g coriander
2 tbsp chopped tarragon
2 tbsp chopped dill
2 tbsp chopped mint
90ml olive oil
Place the couscous in a large bowl and cover with the boiling water or stock. Cover the bowl with cling film and leave for 10 minutes.
Meanwhile, fry the onion in the olive oil on a medium heat until golden and completely soft. add the salt and cumin and mix well. Leave to cool slightly.
Next, make the herb paste by placing all the ingredients into a food processor and blitzing until smooth. Here's a picture of mine, whipped up in a measuring jug with my trusty stick blender:
One of the things I love most about Ottolenghi's recipe's are the use of colour-who could fail to smile at creating something such a deep, froggy, fresh-cut-grass green?
Add this to the couscous and mix everything together with a fork to fluff it up. Now add the cooked onion, the pistachios, spring onions, green chilli and rocket, and gently mix. serve at room temperature.
Here we have it:
Again, I totally love the use of colour; I really think the single-focus devotion to green is something to admire. This was ace eaten by the bowlful with a little bit of feta crumbled on top as a whole meal, but i think it would also totally work as a side dish for little burek or spanakopita, or any number of the Small Fried Things I like to cook on a regular basis. The flavour of the herbs and greenery in this dish is strong, almost medicinal, but in a good way, and totally enhanced by the pep of rocket, so I think it would make the ideal foil for cutting through salty foods, hence the feta. Another great point to note about this dish is it perfectly matched the grassy, slightly acidic New Zealand Sauvignon Blanc that I seem to be drinking by the bucketload this summer. I thought it would be an okay bedfellow but it's turned out to be a match of marriage material proportions. And anything that's an excuse to crack open a bottle is a keeper in my book.
However, sometimes, surprisingly, I run out of courgettes. So I've been finding other, fussless recipes for something light but satisfying, and have reverted back to my student habit of big-batching bowfuls of the stuff and keeping it in the fridge for whenever I feel like grabbing a plateful. It's a kind of cooking and eating that satisfies my internal unstructured forager instincts, without me resorting to standing in front of the fridge repeatedly eating the odd bit of cheese, or olives, or whatever, and ignoring dinner (if left to my own devices long enough this is exactly the kind of behaviour I consider to be normal, and don't even act like you don't do it too).
Now that Ottolenghi and I are buds again, I've been hitting his cookbook up regularly. There are Plenty (you don't have to think I'm funny, but it helps) of recipes of his that use bunch after bunch of summer produce, to the point where I feel like I'm racing against the calendar to try as many as possible before the weather starts to turn and I find myself back in the season for funghi, winter squash, and roots. This one perfectly fits my current 'why make the kitchen hotter than it has to be?' mood, and might just be the best looking and tasting couscous I have ever eaten:
Green Couscous
150g couscous
160ml boiling water or vegetable stock
1 small onion, thinly sliced
1 tbsp olive oil
1/4 tsp salt
1/4 tsp ground cumin
50g shelled unsalted pistachios, toasted and roughly chopped
3 spring onions, finely sliced
30g rocket, chopped
Herb Paste
20g parsley
20g coriander
2 tbsp chopped tarragon
2 tbsp chopped dill
2 tbsp chopped mint
90ml olive oil
Place the couscous in a large bowl and cover with the boiling water or stock. Cover the bowl with cling film and leave for 10 minutes.
Meanwhile, fry the onion in the olive oil on a medium heat until golden and completely soft. add the salt and cumin and mix well. Leave to cool slightly.
Next, make the herb paste by placing all the ingredients into a food processor and blitzing until smooth. Here's a picture of mine, whipped up in a measuring jug with my trusty stick blender:
One of the things I love most about Ottolenghi's recipe's are the use of colour-who could fail to smile at creating something such a deep, froggy, fresh-cut-grass green?
Add this to the couscous and mix everything together with a fork to fluff it up. Now add the cooked onion, the pistachios, spring onions, green chilli and rocket, and gently mix. serve at room temperature.
Here we have it:
Again, I totally love the use of colour; I really think the single-focus devotion to green is something to admire. This was ace eaten by the bowlful with a little bit of feta crumbled on top as a whole meal, but i think it would also totally work as a side dish for little burek or spanakopita, or any number of the Small Fried Things I like to cook on a regular basis. The flavour of the herbs and greenery in this dish is strong, almost medicinal, but in a good way, and totally enhanced by the pep of rocket, so I think it would make the ideal foil for cutting through salty foods, hence the feta. Another great point to note about this dish is it perfectly matched the grassy, slightly acidic New Zealand Sauvignon Blanc that I seem to be drinking by the bucketload this summer. I thought it would be an okay bedfellow but it's turned out to be a match of marriage material proportions. And anything that's an excuse to crack open a bottle is a keeper in my book.
04/08/2011
All That Glitters
Even as someone who would undoubtedly rather be cooking than doing anything else, I have no trouble admitting that it's sometimes very difficult to cook in summer. When it's hot outside, there are so many other things that demand your attention; the garden, work being busier, people suddenly feeling a lot less like sitting inside watching dvd boxsets all day. Not to mention the fact that it's quite frankly, too hot to want to be stood over a stove all afternoon. So I tend to find in summer, that I eat things I can throw together quickly, composed primarily of raw ingredients. Probably not even interesting enough to be termed salads, for the most part. Not exactly the kind of thing people want to be reading about; although it keeps my tumblr followers in 'Things I Ate' pictures. If they like that sort of thing.
Nevertheless, there is one form of cooking that will keep me in the kitchen, and that, my friends, is baking. While I was compiling our snazzy new Recipe Index, I noticed the alarming amount of baked goods I actually churn out. I say alarming, only because I was alarmed that the number is only, realistically, about half of what I actually bake, since i haven't included repeats of recipes. My hand is near permanently glued to the whisk, my devotion to the ritual of ingredients so strong that when making lemon drizzle cake, I looked at Ed like he was insane for suggesting the creamed butter and sugar had 'probably been beaten enough', and I had the gall to correct Hugh Fearnley Whittingstall's directions on how exactly to add eggs and flour. Ed's 'I think this has risen more than last time' elicited only a wry smile from me. Of course it had. We'd done it my way. It's taken me half a year's worth of reflection on exactly what I cook and when to realize that baking is so second-nature to my day-to-day routine, that it's so ingrained and habitual, that at the tender age of 23 I already have something of the cooking traditionalist about me. Which means I have a cooking tradition. Which means I can be proud. and proud I certainly am.
Tradition, however, gets stale quicker than baked goods left on a countertop uneaten. So it was with a mixture of fear and excitement that I embarked upon my first trials of the recipes in Harry Eastwood's Red Velvet and Chocolate Heartache. The reason the recipes in this book are so deviant is because rather than using butter in her recipes, Eastwood uses grated or pureed vegetables. This is ostensibly for dietary purposes, something I inherently disapprove of (especially since the book is so unsubtly marketed toward women), but I figured, hey, I won the book, and finding out new things about the properties of vegetables will be a learning experience my baking could benefit from. So after carefully deciding which of the recipes I'd dogeared in my initial reading to make, I whipped out the cheesegrater and got busy:
Courgette and Chamomile Cupcakes
Makes 12
2 medium, free-range eggs
120g caster sugar
finely grated zest of 1/2 a lemon
200g topped, tailed, peeled, and finely grated courgette (I used a yellow one from my garden)
5 camomile teabags (I used pukka's chamomile and vanilla blend; and I buy most of my herbal teas from them, not because i necessarily buy into ayurveda, but because they're the best tasting ones I've found)
150g white rice flour (all the recipes in this book are wheat free but lazybones like me can sub plain white flour)
50g ground almonds
2 tsp baking powder
1/2 bicarbonate of soda
1/4 tsp salt (i don't often salt my baking, unless it's chocolate, so i ignored this)
for the icing:
3 tbsp strong chamomile tea (use one tea bag and 100ml boiling water)
2 tbsp freshly squeezed lemon juice
160g icing sugar, sieved
you will need:
a 12 hole muffin tray
12 cupcake cases
preheat the oven to 180 degrees c/gas mark 4. line the muffin tray with the paper cases.
in a medium-sized mixing bowl, whisk the eggs and sugar for 3 minutes until fluffy and pale. first add the lemon zest and courgette, and give it a whisk until fully incorporated. Next, tip the chamomile out of its teabags (it comes out as a fine powder) into the egg and sugar mixture, and add the flour, ground almonds, baking powder, bicarbonate of soda, and salt.
once all are well mixed in together, ladle the mixture evenly into the cupcake cases so that it comes four fifths of the way up the sides. Bake for 30 minutes.
Remove the cupcakes from the oven and cool on a wire rack for 15 minutes.
To make the icing, mix the chamomile tea and lemon juice with the icing sugar in a small bowl until you reach a white, paste like consistency. Ice the cupcakes with the back of a spoon (dipping the spoon into the surplus tea makes it easier)
So here are mine:

Note that I couldn't resist trialling the edible glitter I got in the same Iron Cupcake Victory as the book. I sort of angsted about these while they were baking. I wasn't entirely sure they'd have the same rise and great texture I'm normally so proud of in my baking. But my doubts were assuaged, as these little beauties came out just perfect. The texture of the crumb was actually really springy; and the courgette and ground almond kept it moist. They tasted amazing; the chamomile flavour was a lot more pronounced than i thought it would be, even in the icing, and since i have something of a fetish for the more floral flavours, I was in cake heaven. i took some down to work, upon which kayleigh, my kitchen manager exclaimed that she wants these as her wedding cakes (despite not being engaged), and my American friend Ed deciding that these were excellent enough to brag to half the village about. I'm still answering questions about them when I turn up at work now. I'm looking forward to trying other recipes from this book in the near future, as there are countless other techniques using vegetables i want to try; like using parsnips or beetroot to make fudge, and using aubergine in a dense chocolate torte.
Nevertheless, there is one form of cooking that will keep me in the kitchen, and that, my friends, is baking. While I was compiling our snazzy new Recipe Index, I noticed the alarming amount of baked goods I actually churn out. I say alarming, only because I was alarmed that the number is only, realistically, about half of what I actually bake, since i haven't included repeats of recipes. My hand is near permanently glued to the whisk, my devotion to the ritual of ingredients so strong that when making lemon drizzle cake, I looked at Ed like he was insane for suggesting the creamed butter and sugar had 'probably been beaten enough', and I had the gall to correct Hugh Fearnley Whittingstall's directions on how exactly to add eggs and flour. Ed's 'I think this has risen more than last time' elicited only a wry smile from me. Of course it had. We'd done it my way. It's taken me half a year's worth of reflection on exactly what I cook and when to realize that baking is so second-nature to my day-to-day routine, that it's so ingrained and habitual, that at the tender age of 23 I already have something of the cooking traditionalist about me. Which means I have a cooking tradition. Which means I can be proud. and proud I certainly am.
Tradition, however, gets stale quicker than baked goods left on a countertop uneaten. So it was with a mixture of fear and excitement that I embarked upon my first trials of the recipes in Harry Eastwood's Red Velvet and Chocolate Heartache. The reason the recipes in this book are so deviant is because rather than using butter in her recipes, Eastwood uses grated or pureed vegetables. This is ostensibly for dietary purposes, something I inherently disapprove of (especially since the book is so unsubtly marketed toward women), but I figured, hey, I won the book, and finding out new things about the properties of vegetables will be a learning experience my baking could benefit from. So after carefully deciding which of the recipes I'd dogeared in my initial reading to make, I whipped out the cheesegrater and got busy:
Courgette and Chamomile Cupcakes
Makes 12
2 medium, free-range eggs
120g caster sugar
finely grated zest of 1/2 a lemon
200g topped, tailed, peeled, and finely grated courgette (I used a yellow one from my garden)
5 camomile teabags (I used pukka's chamomile and vanilla blend; and I buy most of my herbal teas from them, not because i necessarily buy into ayurveda, but because they're the best tasting ones I've found)
150g white rice flour (all the recipes in this book are wheat free but lazybones like me can sub plain white flour)
50g ground almonds
2 tsp baking powder
1/2 bicarbonate of soda
1/4 tsp salt (i don't often salt my baking, unless it's chocolate, so i ignored this)
for the icing:
3 tbsp strong chamomile tea (use one tea bag and 100ml boiling water)
2 tbsp freshly squeezed lemon juice
160g icing sugar, sieved
you will need:
a 12 hole muffin tray
12 cupcake cases
preheat the oven to 180 degrees c/gas mark 4. line the muffin tray with the paper cases.
in a medium-sized mixing bowl, whisk the eggs and sugar for 3 minutes until fluffy and pale. first add the lemon zest and courgette, and give it a whisk until fully incorporated. Next, tip the chamomile out of its teabags (it comes out as a fine powder) into the egg and sugar mixture, and add the flour, ground almonds, baking powder, bicarbonate of soda, and salt.
once all are well mixed in together, ladle the mixture evenly into the cupcake cases so that it comes four fifths of the way up the sides. Bake for 30 minutes.
Remove the cupcakes from the oven and cool on a wire rack for 15 minutes.
To make the icing, mix the chamomile tea and lemon juice with the icing sugar in a small bowl until you reach a white, paste like consistency. Ice the cupcakes with the back of a spoon (dipping the spoon into the surplus tea makes it easier)
So here are mine:
Note that I couldn't resist trialling the edible glitter I got in the same Iron Cupcake Victory as the book. I sort of angsted about these while they were baking. I wasn't entirely sure they'd have the same rise and great texture I'm normally so proud of in my baking. But my doubts were assuaged, as these little beauties came out just perfect. The texture of the crumb was actually really springy; and the courgette and ground almond kept it moist. They tasted amazing; the chamomile flavour was a lot more pronounced than i thought it would be, even in the icing, and since i have something of a fetish for the more floral flavours, I was in cake heaven. i took some down to work, upon which kayleigh, my kitchen manager exclaimed that she wants these as her wedding cakes (despite not being engaged), and my American friend Ed deciding that these were excellent enough to brag to half the village about. I'm still answering questions about them when I turn up at work now. I'm looking forward to trying other recipes from this book in the near future, as there are countless other techniques using vegetables i want to try; like using parsnips or beetroot to make fudge, and using aubergine in a dense chocolate torte.
02/08/2011
About face
As I started writing this post before the last one, I was originally going to go on about how long it had been since I'd last posted. As it is, a couple of weeks between posts seems relatively prolific given the time there was between the previous two. But what will remain the same is that as this is going to be another meat curing post, I should start off by addressing the broken promise that I made after my last foray into this subject, my home-cured salami. (here for a quick refresh.) It's about four months since I actually made the stuff, approximately eight weeks of which was spent hanging in my cellar gradually hardening, slightly shriveling due to my overly cautious first approach to hand stuffing natural animal casings (or any other casings, come to that matter) leaving a bit too much space inside, and getting excited by the development of little white specs of mould.
Ultimately I think eight weeks was a bit too long. The texture in the very middle is just about perfect - quite soft and giving. When you slice it you can see the fat start to glisten (especially on the one that's sort of chorizo, but isn't really), and although it's a bit of an odd shape (license to be firmer with the casings next time, they're stronger than they appear) it actually looks like salami. And also, they both taste really good, too, which of course is the most important thing. The flavours are distinct enough, in one the fennel really comes to prominence, in the other the smoked paprika pervading and providing a vibrant red colour.
It is always tempting to just eat it straight up, but the flavour it has when cooked is pretty damn impressive. Initially I just stuck some on a homemade pizza. Do pardon my modesty if I say it was amazing. (It was). I also made something from the hip that was sort of based on Jacob Kenedy's Orecchiette with 'Nduja, a dish I had at on my second visit to Bocca di Lupo. Mine basically consisted of salami finely chopped and fried with red onion and garlic, then adding some sliced aubergine and halved cherry tomatoes before tossing through some paccheri pasta. It lacked the richening sauce from the wine and cream of the original dish, but the melted fat from the salami distributed a deep, winey, meaty flavour throughout, with occasional hits of fennel. I think I may have to work on it and there's something pretty good in there. I still have designs on cooking some variation of razor clams with chorizo, which hopefully will happen at some point soon.
So onto the second part, as I said, this belated salami update was only part of the parcel.
I first came across guanciale in Kenedy's The Geometry of Pasta, where he describes it as "a fatty, porcine treat, hard to find but worth seeking out." And if it's worth seeking out, then there's a good chance it's worth persevering with making your own for several months. Guanciale is the jowl of the pig, or in simple terms, its face. Cheek, specifically. Pig's cheeks are amazing, one of my first attempts at making pasta was a pig's cheek ravioli where I cooked the cheeks for several hours until the meat fell apart but was able to come together as little lumps of pasta filling from all the sticky, gelatinous fat in and around it. As a cut of meat it's at least half fat, probably more 65% - 35% fat to meat. So of course I wanted to try curing it at some point, and it seems ideal for doing so.
Up to this stage all my efforts at curing have come with a reassuring helping hand from Hugh Fearnley-Whittingstall, but neither The River Cottage Meat Book nor The River Cottage Cookbook offers any sort of guide for curing pig's cheeks. Neither does Kenedy's Bocca, a book which is so amazing on all other levels I shall forgive it. So this is where the theory of doing things over so you know the basics well enough to be able to wing it on other things comes into play. The sort of thing that someone impatient with a short attention span doesn't bother to do. Like me.
Nonetheless, I kind of did that, but just used my one bacon curing as the basis. I used the flavoured cure mix that I had been planning on using for the second round of bacon curing, which never actually materialised. As a much smaller cut than a 2kg pork belly, I thought it must probably take less time to apply the cure in the initial stage. As for hanging and air curing, I had a bit of a gander around the internet and found that Michael Ruhlman suggests hanging it for two months. Michael Ruhlman co-wrote The French Laundry Cookbook (as well as Thomas Keller's other books), and was one of the disciples on Anthony Bourdain's pilgrimage to The French Laundry, so by association his opinion will do nicely.
Anyway, the cure mix was as follows;
1kg salt
1kg demerera sugar
25g ground black pepper
20 juniper berries, crushed
a few bay leaves, chopped
So I repeated the same process of applying a rub of cure mix each day for just under a week, then rinsing it off, patting dry and hanging, although whereas the bacon hung for about a week, this will hang for up to two months. As of now, it's been up about a month. I already can't wait for it to be ready, and it may be hard to resist temptation to take it down early at the expense of a bit more flavour maturation.
The prospect of my own pasta combined with unctuous, heavy, pork fat is quite something. Whereas with the salami I pretty much made it just because I wanted to, and it was quite an obvious thing to cure and as such didn't really have anything specifically planned for its use. With guanciale on the other hand, I'm already accruing recipe plans, all involving making pasta as well, so there shouldn't be much excuse to not go on and on about it afterwards.
Ultimately I think eight weeks was a bit too long. The texture in the very middle is just about perfect - quite soft and giving. When you slice it you can see the fat start to glisten (especially on the one that's sort of chorizo, but isn't really), and although it's a bit of an odd shape (license to be firmer with the casings next time, they're stronger than they appear) it actually looks like salami. And also, they both taste really good, too, which of course is the most important thing. The flavours are distinct enough, in one the fennel really comes to prominence, in the other the smoked paprika pervading and providing a vibrant red colour.
It is always tempting to just eat it straight up, but the flavour it has when cooked is pretty damn impressive. Initially I just stuck some on a homemade pizza. Do pardon my modesty if I say it was amazing. (It was). I also made something from the hip that was sort of based on Jacob Kenedy's Orecchiette with 'Nduja, a dish I had at on my second visit to Bocca di Lupo. Mine basically consisted of salami finely chopped and fried with red onion and garlic, then adding some sliced aubergine and halved cherry tomatoes before tossing through some paccheri pasta. It lacked the richening sauce from the wine and cream of the original dish, but the melted fat from the salami distributed a deep, winey, meaty flavour throughout, with occasional hits of fennel. I think I may have to work on it and there's something pretty good in there. I still have designs on cooking some variation of razor clams with chorizo, which hopefully will happen at some point soon.
So onto the second part, as I said, this belated salami update was only part of the parcel.
I first came across guanciale in Kenedy's The Geometry of Pasta, where he describes it as "a fatty, porcine treat, hard to find but worth seeking out." And if it's worth seeking out, then there's a good chance it's worth persevering with making your own for several months. Guanciale is the jowl of the pig, or in simple terms, its face. Cheek, specifically. Pig's cheeks are amazing, one of my first attempts at making pasta was a pig's cheek ravioli where I cooked the cheeks for several hours until the meat fell apart but was able to come together as little lumps of pasta filling from all the sticky, gelatinous fat in and around it. As a cut of meat it's at least half fat, probably more 65% - 35% fat to meat. So of course I wanted to try curing it at some point, and it seems ideal for doing so.
Up to this stage all my efforts at curing have come with a reassuring helping hand from Hugh Fearnley-Whittingstall, but neither The River Cottage Meat Book nor The River Cottage Cookbook offers any sort of guide for curing pig's cheeks. Neither does Kenedy's Bocca, a book which is so amazing on all other levels I shall forgive it. So this is where the theory of doing things over so you know the basics well enough to be able to wing it on other things comes into play. The sort of thing that someone impatient with a short attention span doesn't bother to do. Like me.
Nonetheless, I kind of did that, but just used my one bacon curing as the basis. I used the flavoured cure mix that I had been planning on using for the second round of bacon curing, which never actually materialised. As a much smaller cut than a 2kg pork belly, I thought it must probably take less time to apply the cure in the initial stage. As for hanging and air curing, I had a bit of a gander around the internet and found that Michael Ruhlman suggests hanging it for two months. Michael Ruhlman co-wrote The French Laundry Cookbook (as well as Thomas Keller's other books), and was one of the disciples on Anthony Bourdain's pilgrimage to The French Laundry, so by association his opinion will do nicely.
Anyway, the cure mix was as follows;
1kg salt
1kg demerera sugar
25g ground black pepper
20 juniper berries, crushed
a few bay leaves, chopped
So I repeated the same process of applying a rub of cure mix each day for just under a week, then rinsing it off, patting dry and hanging, although whereas the bacon hung for about a week, this will hang for up to two months. As of now, it's been up about a month. I already can't wait for it to be ready, and it may be hard to resist temptation to take it down early at the expense of a bit more flavour maturation.
The prospect of my own pasta combined with unctuous, heavy, pork fat is quite something. Whereas with the salami I pretty much made it just because I wanted to, and it was quite an obvious thing to cure and as such didn't really have anything specifically planned for its use. With guanciale on the other hand, I'm already accruing recipe plans, all involving making pasta as well, so there shouldn't be much excuse to not go on and on about it afterwards.
Labels:
curing,
guanciale,
Jacob Kenedy,
meat eating,
pork,
salami
27/07/2011
Spice Girl.
If there's one thing I know about, it's my own mind. I've been with it all my life, and I deal with it every day, so if I weren't an expert, i may as well throw in the towel, right? Given my recent disappointment with the functionality of an Ottolenghi recipe, I knew that if I didn't make another one soon, I'd write off the recipes in Plenty as 'too difficult' as I internalized the bad mood I felt because of those impossible supermarket gigantibeans. So I played to my strengths, and found myself a recipe well within my comfort zone, which, as I have previously explained, is Indian style food.
I chose his double potato vindaloo. Now, the magnificent vindaloo is something much maligned in british culture, a curry seen as the 'hottest of the hot', and often ordered in a terribly unorthodox chicken guise by lager swilling red-faced middle aged dudes in a drunken test of machismo in indian restaurants. You don't need me to explain to you that in this context it's interesting cultural history and origin is often disregarded.
I don't claim to be any kind of expert, as a 23 year old english girl, on Indian cuisine, but I do feel it is only respectful and right to point out the often overlooked raisons d'etre of a dish that has suffered culturally in England mostly due to a seemingly wilful ignorance about food from other cultures. One of the best meals of my life was a vindaloo, a vegetarian one cooked for me by a hindu chef on a beach in goa, where i was staying in a hut made of woven palm fronds with a sand floor. I must have been about fourteen years old, and I remember the word vindaloo striking fear into my heart as I definitely did not have the spice tolerance then that I have now. I tried it anyway, and I'm glad I did, because while it was hot, it was also sweet and warming, and I'm sure if i was living that moment now i'd be anxiously taking notes in a painfully hip moleskine in order to recreate it, but young me was pretty much just concerned with eating it. I don't think it's a taste experience I could replicate, anyway, honestly speaking. i was probably a combination of the location, the sensation of the new, and a mood of feeling like things were good, that I don't mind admitting was largely absent in my teens.
Nevertheless, older Kirsty, armed with her books, her kitchen, and her painfully hip moleskines, still attempts to cook vindaloo. Later in life I learned that vindaloo is a dish particular to goa, a region colonized by the portugese, and so named because 'vin' refers to the vinegar used in the dish. 'aloo' means potatoes, referring to the other necessary component. It is apparently traditionally made with pork, but I have always made vegetarian versions in reference to my first experience of the dish, and because a curry containing potatoes is a logically solid vegetarian offering. It's 'hotter than hot' reputation is apparently a misguided one, as although the sauce is robust due to the inclusion of a lot of warming spices, it's not hotter than say, a traditional goan red fish curry. Usually I rely on vegetarian-ising a pork recipe from Camellia Punjabi's 50 curries of india (a really invaluable beginner's curry cooking source full of amazing information about everything) but in my endeavours to regain culinary confidence, and my joy at finding a sound vegetarian recipe, I jumped at the chance when i saw Mr. Ottolenghi's recipe. so here is my attempt at it (and no panics this time, pure success):
Double Potato Vindaloo
8 cardamom pods
1tbsp cumin seeds
1tbsp coriander seeds
1/2 tsp cloves
1/4 tsp ground turmeric
1 tsp sweet paprika
1 tsp ground cinnamon
2 tbsp vegetable oil
12 shallots, chopped
1/2 tsp brown mustard seeds
1/2 tsp fenugreek seeds
25 curry leaves
2 tbsp fresh chopped root ginger
1 fresh red chilli, finely chopped
3 ripe tomatoes, peeled and roughly chopped
50ml cider vinegar
400ml water
400g peeled waxy potatoes, cut into 2.5cm dice
2 small red peppers, cut into 2cm dice
400g sweet potatoes, peeled and cut into 2.5cm dice
salt
mint and coriander leaves to serve
Start by making a spice mix. Dry-roast the cardamom pods and cumin and coriander seeds in a small frying pan until they begin to pop. Transfer to a pestle and mortar and add the cloves. Work to a fine powder, removing and discarding the cardamom pods once the seeds are released. Add the turmeric, paprika and cinnamon and set aside.
Heat up the oil in a large heavy-based pot. Add the shallots with the mustard and fenugreek seeds, and saute on a medium-low heat for 8 minutes, or until the shallots brown. Stir in the spice mix, curry leaves, ginger, and chilli, and cook for a further 3 minutes. Next, add the tomatoes, vinegar, water, sugar, and some salt. Bring to the boil, then leave to simmer, covered, for 20 minutes.
Add the potatoes and red peppers and simmer for another 20 minutes. For the last stage, add the sweet potatoes. Make sure all the vegetables are just immersed in the sauce (add more water if needed) and continue cooking, covered, for about 40 minutes, or until the potatoes are tender.
Remove the lid and leave to bubble away for about 10 minutes to reduce and thicken the sauce. Serve hot, with plain rice, and garnished with herbs.
So here is mine, served with a touch of yoghurt to cool its jets a little (sorry purists and vegans!), with white rice in a seperate bowl cos it was pretty saucy:

This recipe is probably as close as i am likely to come to that first experience of vindaloo. It was sweet, jam packed full of warming spices, and solid due to the potato content. Sweet potato is a bit of an unusual addition, but by this time i expect no less from my homeboy Ottolenghi. I actually think this recipe in particular is very suited to plenty as a book, a hybrid dish in essence, with European and Indian influence, it seems to mesh with Ottolenghi's 'citizen of the world' mixed heritage and experimental attitude. My confidence in working with his recipes is totally restored, as i knew it would be, working well within my comfort zones. This, like any other curry recipe, is great for my usual style of big-batching and living off things for a few days, a product of my odd working hours and dietary choice in a household of devoted carnivores. Why? because curries improve in flavour if left to sit for a day or two. The spices intensify and meld together more effectively. People who claim they can't eat the same dish two days running really should try indian cookery; sometimes it's like encountering a totally different dish the next day. Since my potatoes are almost ready to be harvested, I can see myself making this again in the not too distant future, but before i do i definitely want to have a bash at a very interesting looking potato tarte tatin that's also in Plenty. I mean, comfort zones are nice to retun to for a boost every now and then, but staying in them all the time would be the most boring thing in the world, wouldn't it?
I chose his double potato vindaloo. Now, the magnificent vindaloo is something much maligned in british culture, a curry seen as the 'hottest of the hot', and often ordered in a terribly unorthodox chicken guise by lager swilling red-faced middle aged dudes in a drunken test of machismo in indian restaurants. You don't need me to explain to you that in this context it's interesting cultural history and origin is often disregarded.
I don't claim to be any kind of expert, as a 23 year old english girl, on Indian cuisine, but I do feel it is only respectful and right to point out the often overlooked raisons d'etre of a dish that has suffered culturally in England mostly due to a seemingly wilful ignorance about food from other cultures. One of the best meals of my life was a vindaloo, a vegetarian one cooked for me by a hindu chef on a beach in goa, where i was staying in a hut made of woven palm fronds with a sand floor. I must have been about fourteen years old, and I remember the word vindaloo striking fear into my heart as I definitely did not have the spice tolerance then that I have now. I tried it anyway, and I'm glad I did, because while it was hot, it was also sweet and warming, and I'm sure if i was living that moment now i'd be anxiously taking notes in a painfully hip moleskine in order to recreate it, but young me was pretty much just concerned with eating it. I don't think it's a taste experience I could replicate, anyway, honestly speaking. i was probably a combination of the location, the sensation of the new, and a mood of feeling like things were good, that I don't mind admitting was largely absent in my teens.
Nevertheless, older Kirsty, armed with her books, her kitchen, and her painfully hip moleskines, still attempts to cook vindaloo. Later in life I learned that vindaloo is a dish particular to goa, a region colonized by the portugese, and so named because 'vin' refers to the vinegar used in the dish. 'aloo' means potatoes, referring to the other necessary component. It is apparently traditionally made with pork, but I have always made vegetarian versions in reference to my first experience of the dish, and because a curry containing potatoes is a logically solid vegetarian offering. It's 'hotter than hot' reputation is apparently a misguided one, as although the sauce is robust due to the inclusion of a lot of warming spices, it's not hotter than say, a traditional goan red fish curry. Usually I rely on vegetarian-ising a pork recipe from Camellia Punjabi's 50 curries of india (a really invaluable beginner's curry cooking source full of amazing information about everything) but in my endeavours to regain culinary confidence, and my joy at finding a sound vegetarian recipe, I jumped at the chance when i saw Mr. Ottolenghi's recipe. so here is my attempt at it (and no panics this time, pure success):
Double Potato Vindaloo
8 cardamom pods
1tbsp cumin seeds
1tbsp coriander seeds
1/2 tsp cloves
1/4 tsp ground turmeric
1 tsp sweet paprika
1 tsp ground cinnamon
2 tbsp vegetable oil
12 shallots, chopped
1/2 tsp brown mustard seeds
1/2 tsp fenugreek seeds
25 curry leaves
2 tbsp fresh chopped root ginger
1 fresh red chilli, finely chopped
3 ripe tomatoes, peeled and roughly chopped
50ml cider vinegar
400ml water
400g peeled waxy potatoes, cut into 2.5cm dice
2 small red peppers, cut into 2cm dice
400g sweet potatoes, peeled and cut into 2.5cm dice
salt
mint and coriander leaves to serve
Start by making a spice mix. Dry-roast the cardamom pods and cumin and coriander seeds in a small frying pan until they begin to pop. Transfer to a pestle and mortar and add the cloves. Work to a fine powder, removing and discarding the cardamom pods once the seeds are released. Add the turmeric, paprika and cinnamon and set aside.
Heat up the oil in a large heavy-based pot. Add the shallots with the mustard and fenugreek seeds, and saute on a medium-low heat for 8 minutes, or until the shallots brown. Stir in the spice mix, curry leaves, ginger, and chilli, and cook for a further 3 minutes. Next, add the tomatoes, vinegar, water, sugar, and some salt. Bring to the boil, then leave to simmer, covered, for 20 minutes.
Add the potatoes and red peppers and simmer for another 20 minutes. For the last stage, add the sweet potatoes. Make sure all the vegetables are just immersed in the sauce (add more water if needed) and continue cooking, covered, for about 40 minutes, or until the potatoes are tender.
Remove the lid and leave to bubble away for about 10 minutes to reduce and thicken the sauce. Serve hot, with plain rice, and garnished with herbs.
So here is mine, served with a touch of yoghurt to cool its jets a little (sorry purists and vegans!), with white rice in a seperate bowl cos it was pretty saucy:
This recipe is probably as close as i am likely to come to that first experience of vindaloo. It was sweet, jam packed full of warming spices, and solid due to the potato content. Sweet potato is a bit of an unusual addition, but by this time i expect no less from my homeboy Ottolenghi. I actually think this recipe in particular is very suited to plenty as a book, a hybrid dish in essence, with European and Indian influence, it seems to mesh with Ottolenghi's 'citizen of the world' mixed heritage and experimental attitude. My confidence in working with his recipes is totally restored, as i knew it would be, working well within my comfort zones. This, like any other curry recipe, is great for my usual style of big-batching and living off things for a few days, a product of my odd working hours and dietary choice in a household of devoted carnivores. Why? because curries improve in flavour if left to sit for a day or two. The spices intensify and meld together more effectively. People who claim they can't eat the same dish two days running really should try indian cookery; sometimes it's like encountering a totally different dish the next day. Since my potatoes are almost ready to be harvested, I can see myself making this again in the not too distant future, but before i do i definitely want to have a bash at a very interesting looking potato tarte tatin that's also in Plenty. I mean, comfort zones are nice to retun to for a boost every now and then, but staying in them all the time would be the most boring thing in the world, wouldn't it?
Subscribe to:
Posts (Atom)